Stepping up from JPEG to RAW format meant one of the greatest improvements I went through in my photography life. It does come at a price but it will boost the quality of your images to a whole new level. Join me on this nerdy journey!
Table of Contents
Disclosure
Why should you use the RAW format in your photography?
But before we start, I should mention what these actually are. JPEG is the wide-spread image format that pretty much rules the world. It is relatively small and super easy to handle because it is compressed. During the compression process, though, there is always a certain level of quality loss.
On the contrary, the RAW format is a lossless format that saves data that went into the camera sensor. So, in fact, you could say that every camera shoots RAW. At least before it compresses the file into a JPEG. Some cameras can produce a RAW file, some only produce JPEGs. Check out your settings to find out!
This format is basically an imprint of what your camera sees and does when you take a photo. So it saves physical information about the light intensity and colour of the scene, at the best of the camera sensor’s performance. In other words – you press the shutter and real magic happens. You may as well shout ‘Exposure patronum!’ for potential passers-by. You know, just to give it that subtle touch of a drama.
1. RAW format records all data possible
RAW is also often called a digital ‘negative’, a term from classic film photography. It’s not because RAW would be negative but because it is a format that includes all information necessary for ‘developing’ a viewable image.

Subscribe now and get my free ebook straight into your mailbox!
In the good old film times, photographers used so-called ‘darkroom’ to develop their images in red safelight to which film material is insensitive. Nowadays, which software is the number one for processing RAW images? Adobe Lightroom. Get it? Lightroom. Beautiful wordplay.
The RAW format has a richer colour palette than JPEG. It records the exposure data so you can correct it later. And it has generally higher quality than JPEG – there are no side effects of lossy data compression which is typical for JPEG. If you’re still confused, just keep on reading and stick to the magic version. That’s what I do anyway.

2. Editing RAW format is non-destructive
I love the fact that whatever I do in Lightroom is 100% reversible. You can re-edit your image how many times you want without losing any quality. That is because the RAW format is a set of data, rather than an image. So even if you tweak the data in your editing software, it will still remember the original data that came directly out of your camera sensor.
On the contrary, one thing to remember about JPEGs – any edit of a JPEG image is destructive. It is a lossy format and editing it and saving again will only emphasize the data loss. It’s as if you decided to bake raspberry muffins but once they’re done you realized you actually wanted blueberry muffins. So you drill a few holes in them and insert blueberries. You kind of reached the goal. But the result is a raspberry-blueberry weirdo with holes in it. I hope you enjoyed my muffin parallel.
Since I started shooting in RAW, I have revisited and re-edited certain photos at least a bzillion times. I only wish I have started earlier – all those good photos that could be great photos! Everybody develops and learns about what they like and dislike in editing – RAW format gives you the opportunity to come back and apply what you didn’t know. Even years later.
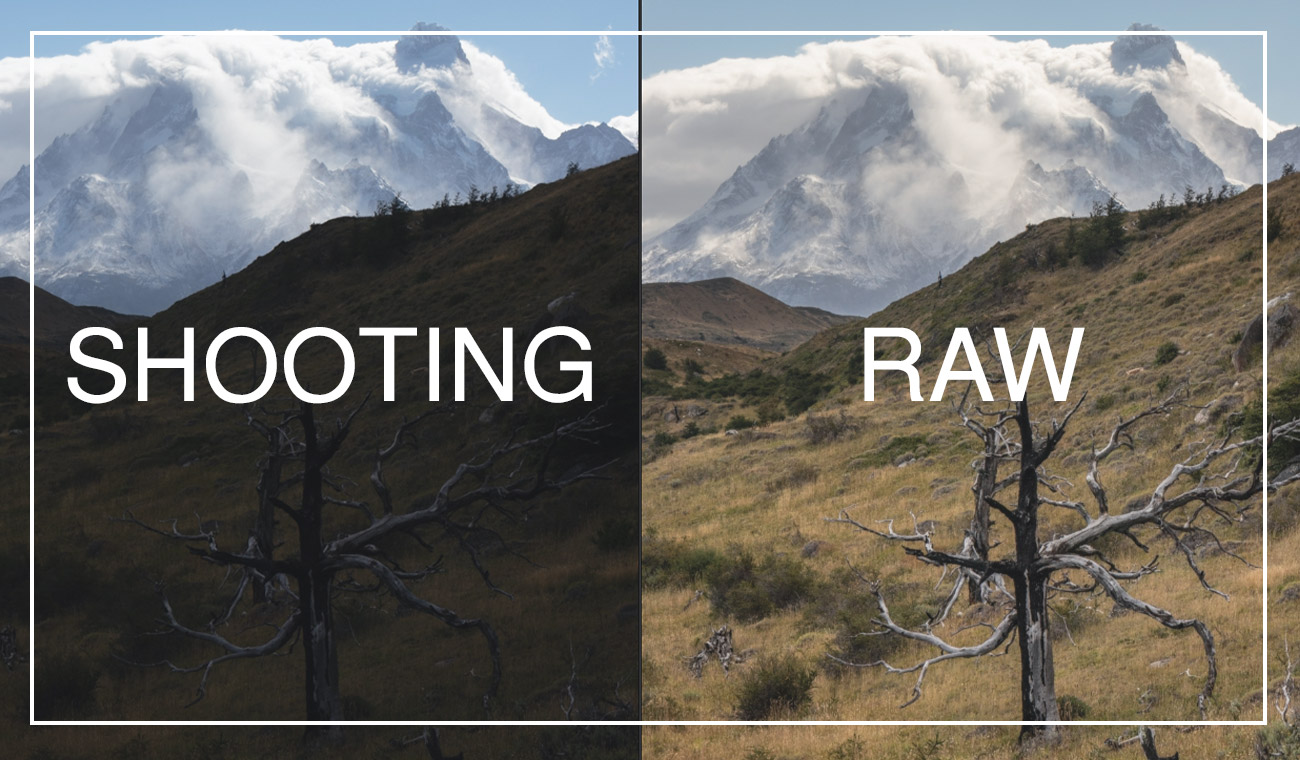
3. You can restore details
RAW format partially replaces the HDR (High Dynamic Range) method I used in Bavaria since it allows you to restore detail in shadows or highlights. You know, those parts of photos that seem to be very dark or very white. RAW can correct it. Up to a certain level without significant loss of quality. There are limits, though!
Always watch your histogram when you’re on location. Even the RAW format can’t do magic!
Besides, you can adjust sharpening and add even more detail. However, before cranking up the sharpening slider all the way up, make sure you understand what it really does!
4. Correct exposure and save photos that would be otherwise lost
This is an extension of my previous point and many photographers’ argument number one for shooting in RAW. If you shoot in JPEG, you have to rely on the exposure you did on location. But sometimes we dramatically under- or overexpose our photos. Knowing the holy trinity of photography helps but it still happens.
If you’re a RAW person, you can still save the day.
It wasn’t enough for me to simply accept what others say. So I did an experiment with RAWs and JPEGs. See the results:


If you look very closely on the JPEG edit above, you’ll notice that the bright areas (that I tried to mute a bit) do not look as crisp as in case of RAW. Which led me to the idea of experimenting with an overexposed image.


5. Adjust white balance
White balance basically defines the warmth or temperature of your image. JPEGs have already their white balance applied. Check out your white balance settings on your camera – it is usually set to ‘AWB’ (Automatic White Balance) by default.
But white balance in RAW files can be easily adjusted in order to warm up or cool down your image. Now, if you have experience with some editing software, you may object – you can do the same with JPEGs. And you’d be right. However, adjusting the white balance for JPEG is not as precise. You also can’t define the temperature in K (= Kelvins).
Let’s say you shoot in JPEG a series of images with AWB on. Every time a cloud covers the sun, your camera will adjust the white balance to be applied to your photo. You’ll end up with a series of images with different temperatures but you’ll have no idea what temperature was used for which photo and it will not be easy to give all the images the same feel of temperature.
Again – RAW files would record all that and you could simply synchronize the white balance for all your photos in one batch.

6. Rotating RAWs does not result in losing quality
Rotating JPEGs is destructive. When I found out about this, I wasn’t entirely surprised. But I still wanted to test how bad the loss of quality by rotating a JPEG photo really is. The result of my mini test? The effect is SAVAGE! I took this JPEG image and rotate it by about 30 degrees. 2x to the right and 2x to the left, back to the original position. I saved it after each rotation. Can you spot the difference?

Why does it matter? I personally adjust the rotation of my photos in 99% of cases and I usually do it more than once. I guess my brain is not placed 100% horizontally in my skull which might be the reason. Well, thank you, parents. What I’m trying to say – the rotation of images during the editing process is one of the most basic things where you really don’t want to sacrifice quality.
And what are the drawbacks of RAW?
Now it may sound as RAW is the only all-problem-solving format. But it isn’t. It isn’t perfect and there is a couple of drawbacks I feel obliged to mention:
1. JPEG is final, RAW must be edited
RAW images are by default a bit flat, without contrast. So don’t despair when you open your RAWs in photo editing software on your computer for the very first time and think “Ugh, yuck”. Which is probably exactly what you’ll think.
Also, be cautious – what you see in your camera’s preview is not what you’ll really get – the camera shows you a JPEG preview which is embedded in the RAW file. Again – magic.
As I wrote at the beginning of this post, the RAW format is not designed to be viewed nor printed. It is designed to be edited first and then exported or printed to be viewed.
When I switched to RAW format for the first time, I was totally overwhelmed. I came back from a trip with hundreds of RAW files and didn’t really know what next. I couldn’t send them to anyone until I edited or at least exported all of them.
So unlike photographing in JPEGs, shooting in RAW includes some serious extra work which is not to be underestimated. Which brings me to the next point.
2. You’ll need editing software to process RAW format
There is no way around it – if you want to edit RAW photos, you’ll need some software to do it. But don’t worry – camera manufacturers usually provide some kind of software when you purchase their camera. So that’s basically for free. There is also plenty of other software out there.
I absolutely love Adobe Lightroom. It’s very intuitive, affordable and its results are amazing. Did I mention that it is amazing? By the way, if you don’t have Lightroom yet, you may want to consider getting it (it’s about 10 USD a month).
3. RAW files are huge
Size of RAW files differs depending on many factors but while a medium-size JPEG spat out by my trusty Canon 80D is about 2 – 6 MB, RAW files are usually around 30 MB.
My favourite settings are ‘RAW + medium JPEG’ which means that both formats will be saved. So I’m able to send some photos directly and without editing to my family and friends. Canon 80D‘s medium JPEGs are also perfectly suitable for family albums, calendars etc. And at the same time – because I also have the RAW format, I have the chance to come back and edit any photo I like.
This comes at a price, though – you’ll need more capacity.
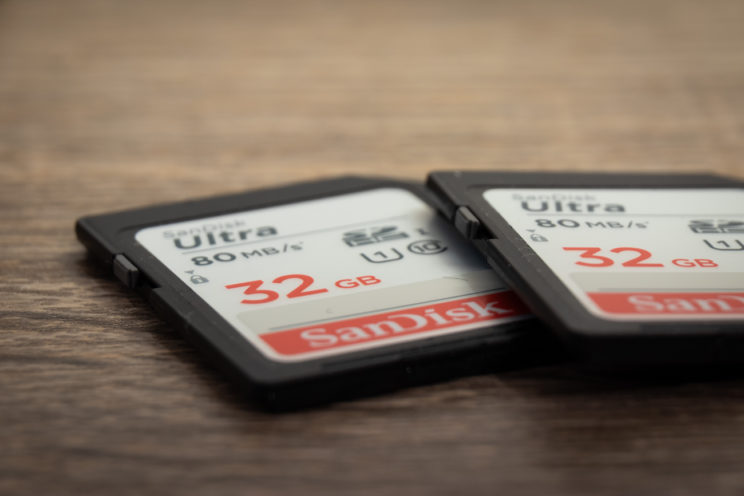
4. You’ll need big fast SD cards
Yeah, once you upgrade to RAWs, the times of 4 GB SD Cards are definitely over. You’ll need at least 32 GB. I really like SanDisk cards. Simply because I never had a card from them that would fail. No ad, just my honest opinion.
5. You’ll need hardware
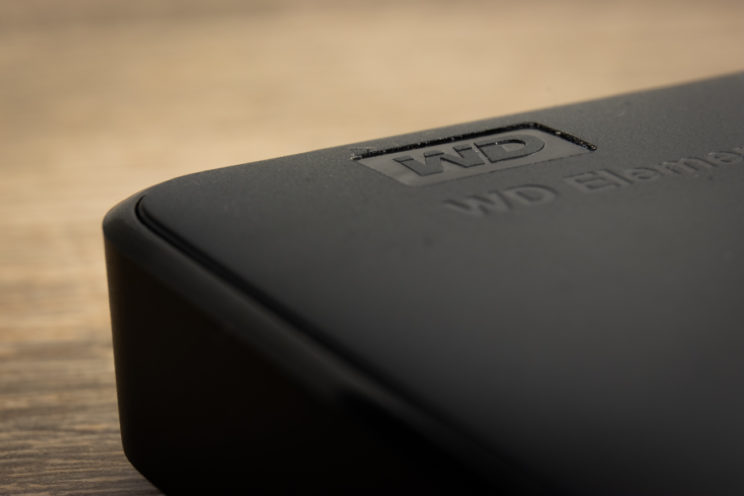
Tweaking 30 MB (or bigger!) monster files with an outdated computer is like tickling a tiger while your legs are bound. You have no chance, the beast will get you. Not many people talk about this but getting some serious computing power to handle Lightroom and work with those big files is probably the highest cost of upgrading to RAW.
Besides, you’ll most likely need some extra storage capacity for all the images. I personally use Western Digital 4 TB external hard drive.
Pin this for later:


Great articles with helpful tips! Thanks for sharing!
Thank youuuu! 🙂
raw + jpeg
My choice, too!
Great insights on shooting in RAW format! I appreciate how you balanced the pros and cons. It really made me reconsider my approach to photo editing and the importance of file quality. Thanks for the tips!
I found this post really enlightening! I appreciate the balanced perspective on shooting in RAW versus JPEG. It helped clarify why RAW files are worth the extra storage space, especially for editing flexibility. However, I understand the downsides, especially when storage is limited or when quick sharing is a priority. Great read, thanks for the insights!
Great insights! I love how you highlighted both the benefits and drawbacks of shooting in RAW. It’s true that the flexibility in post-processing is a game changer, but the file size can be overwhelming for casual photographers. I think I’ll experiment with RAW on special shoots and stick to JPEG for everyday photos. Thanks for sharing!
Great insights on shooting in RAW! I totally agree that the flexibility in post-processing is a game changer, but I also see the point of managing storage and processing time. It really comes down to understanding your specific needs and workflow. Thanks for the thought-provoking read!
This post really opened my eyes to the benefits of shooting in RAW! I never realized how much flexibility it gives in post-processing. However, the file size issue you mentioned is definitely something to consider. Thanks for the balanced perspective!
Great insights on shooting in RAW! I appreciate the pros and cons you mentioned. It’s clear that while RAW gives us more flexibility in editing, it also comes with the challenge of larger file sizes. I think I’ll try it out for my next project and see how it impacts my workflow. Thanks for the tips!
Great insights on shooting in RAW format! I love how you balanced the pros and cons. The flexibility in post-processing is definitely a game changer, but I appreciate the reminder about file size and workflow considerations. Perfect points to think about when deciding how to shoot.
Great insights on shooting in RAW! I never realized how much flexibility it offers in post-processing. However, I can see the points about file size and workflow. It definitely makes me think about when it’s worth it to shoot in RAW versus JPEG. Thanks for shedding light on both sides!
I really enjoyed this breakdown of RAW vs. JPEG! It’s refreshing to see both sides presented so clearly. I’ve always shot in RAW for the flexibility, but I had no idea about the downsides like storage and processing time. This gives me a lot to think about for my next project! Thanks for sharing!