
Table of Contents
Impressionist landscape photography
What would you call photography impressionism? And where is the line between impressionist and abstract? Is there such l and does it even matter? I don’t think it does.
I personally like to think of impressionism in landscape photography as a genre where everything is allowed. There are no rules. Basically, it is a genre of photography anarchy.

Disclosure
The goal is not capturing the landscape as is, during a beautiful sunrise or sunset. You’re trying to transform a feeling, an impression of the scene into a photograph.

Subscribe now and get my free ebook straight into your mailbox!
Intentionally out of focus, almost painting-like look, or even making the viewer think they see brush strokes. These are the typical qualities of an impressionist image you’re looking for.
But I believe you can go even further – doing pretty much anything unusual to capture the moment or in the editing process could be considered as impressionism of some sort.
Over the past months, I’ve collected and experimented with a couple of techniques that can be very useful in this exciting landscape photography sub-genre. By no means is this a complete list! Possibilities are endless!
1. Intentional Camera Movement (ICM) Impressionist Techniques
Let’s kick off with the Holy Grail (do I misuse the religious dictionary too often?). And by that, I mean the Intentional Camera Movement Technique (=ICM).
ICM allows you to create an intentional blur, remove clutter, or even completely decompose the complexity of a scene into mere blocks of rough shapes, tones and colours.
It’s actually really simple – you move the camera while the shutter is open. That’s it.
The logical consequence is that you’ll need to use rather slow shutter speeds in order to get a nice blur. And the consequence of that is often a ridiculously small aperture you’ll have to use.
Nevertheless – unlike classic landscape photography, you don’t have to worry about the ultimate sharpness, so it doesn’t really matter!
A. Panning
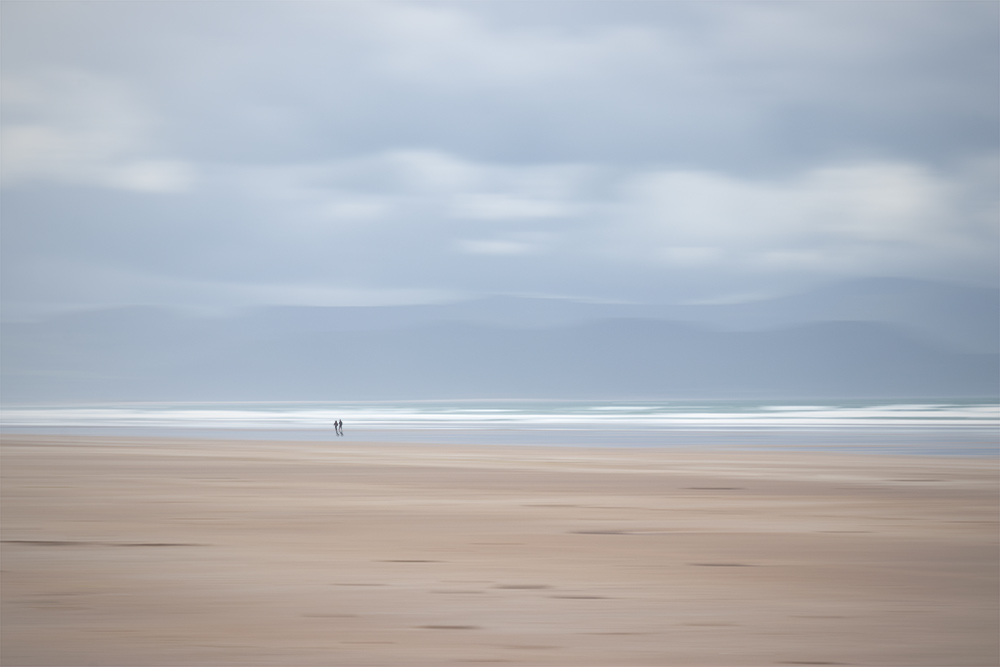
Panning is possibly the easiest and best-known photography technique for achieving the illusion of impressionism.
Horizontal panning is typically used for scenes with strong horizontal structures (e.g. sea or beach). Vertical panning then for scenes with strong vertical structures (e.g. trees or buildings). Diagonal panning is quite rare but hey – why not try it, too?
You can do panning with or without a tripod. However, especially for panning horizontally, I highly recommend using a tripod with a panoramic ball head.
Level your tripod well (not the ball head!), loosen the panoramic screw and start experimenting with various shutter speeds!

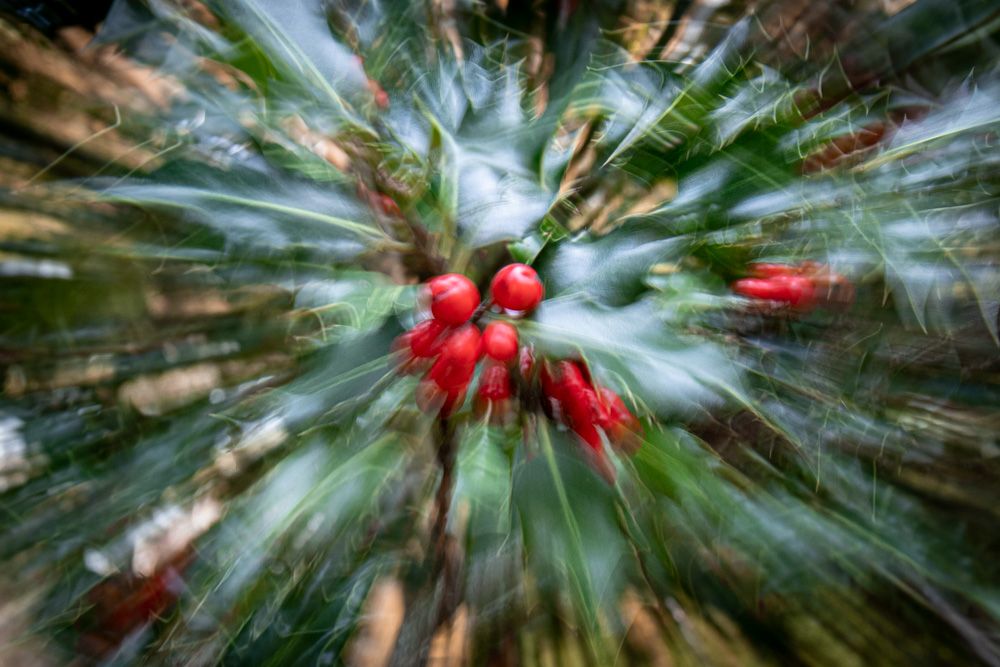
B. Zooming
This ICM method makes me inevitably think of Millennium Falcon jumping to hyperspace. It can be pretty cool, though!
The idea is to zoom in or out (or both if you’re fast enough) while taking a shot. I personally prefer using this impressionist technique without a tripod to make the central part of the image a bit blurry. On a tripod, you’ll get a very sharp centre. Just a personal preference.
TOP TIP: Set a 2-second timer on your camera, so that you can fully concentrate on the zooming action during the shot. You’ll have less time than you think!
C. Rotation
Using a rotational camera movement to achieve an impressionist feel in your photo is really fun. And a brilliant exercise for your arms, especially if you’re a user of a heavy-duty camera.
Also here, I recommend setting the 2-second timer so that you can focus on a proper rotation when the time is up.
TOP TIP: Don’t destroy your wrists! If possible, use both hands to rotate the camera. If you’re a user of an L-Bracket (which you should be), you can pull it a bit further from the camera body and use as a handle!

D. Whipping
This ICM technique is basically a combination of various movements. I call it “whipping”, since there is a bit of pan, a bit of shake and some rotation, too.
The result is – you don’t want to use this technique around people. You will look absolutely ridiculous and everybody will think you’ve lost your sanity.
On the upside, whipping can create some very unique abstract images!
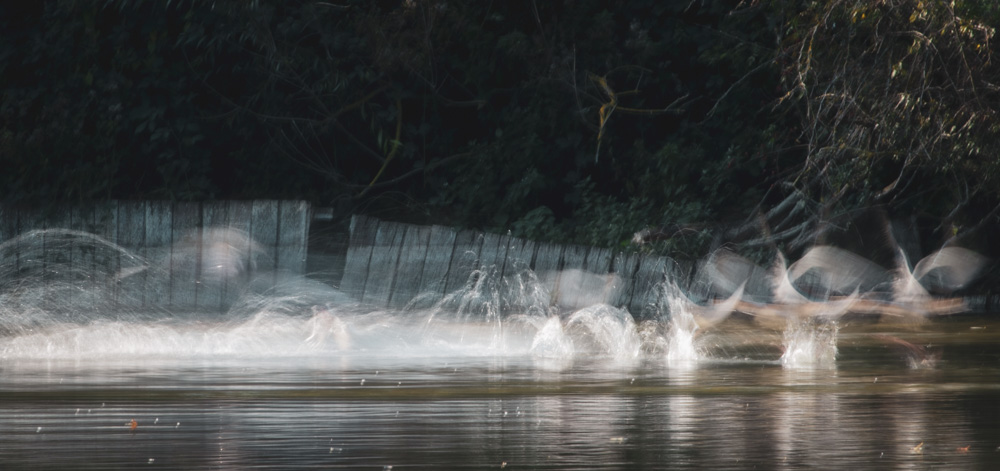
2. Let your subject move
While the idea of intentional camera movement was to move the camera in order to create blur and “brush strokes”, this one is more about a moving subject!
You can use anything that moves – people, cars, animals, etc. The principle remains the same – relatively long shutter speed. Just this time, you’ll benefit from what’s happening in front of your lens.
Or you can combine a moving subject with some additional camera wiggle or panning. The sky is the limit!

3. Looooong shutter speed
We got used to seeing long exposure photos. Usually long exposures of water. Waterfalls, lakes, ocean, rivers. Yes, this technique might be a bit overused. But when you look at work of, let’s say Rohan Reilly, you’ll still get the thrill!
Think of using long shutter speed on a tripod also for different subjects, like leaves or entire trees. Or consider using it for capturing light reflections like Sir Thomas Heaton in this video.
In terms of equipment, you might need some ND Filters.
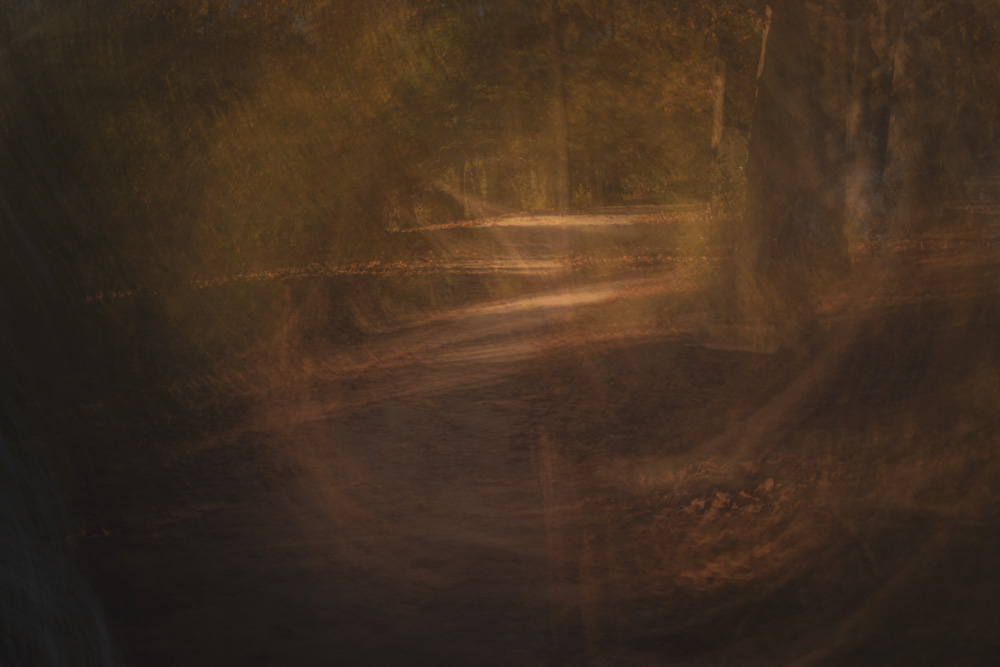
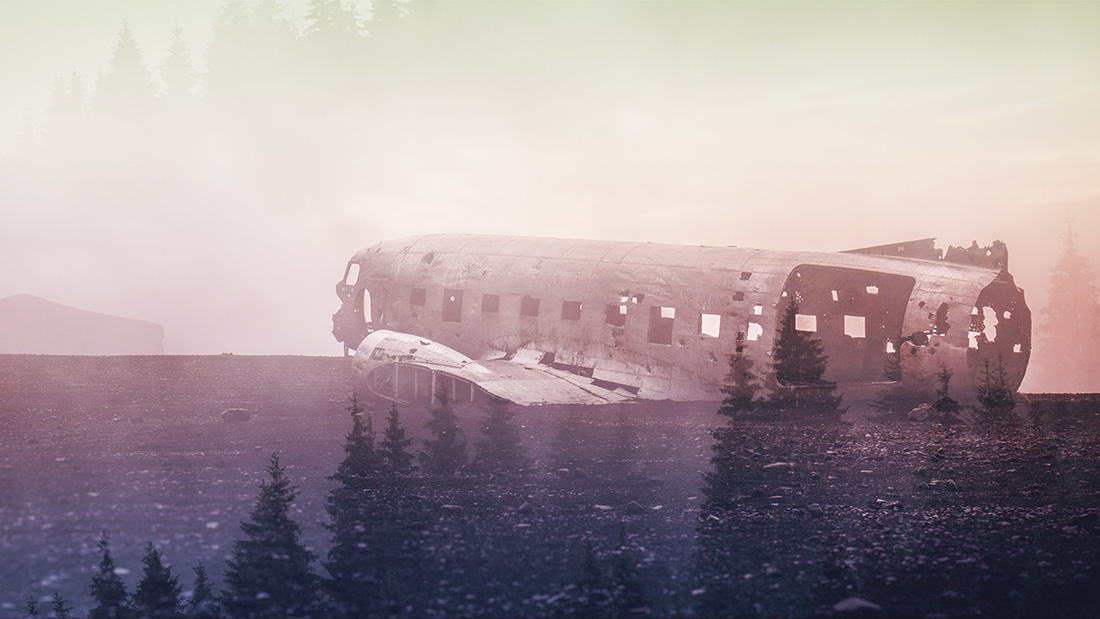
4. Double Exposure
Double exposure is one of the trendy methods right now. The idea is to combine two (usually very different) images.
You’ll need a leading image with a strong contrast – in my case the Iceland plane wreck. And then another image that should be blended into the leading image – in my case a misty German forest. If you’ve been to Iceland, you’ll understand why the combination of Iceland and forests seems so surreal.
Import the images as layers into Photoshop, the leading image at the bottom. Place the second image above and select blending mode “Screen”. That’s it. You can play around with masking or fancy gradients.
And if you’d like to avoid Photoshop completely, check out the settings of your camera. Many camera manufacturers add the ‘multiple-exposure’ feature to the firmware!
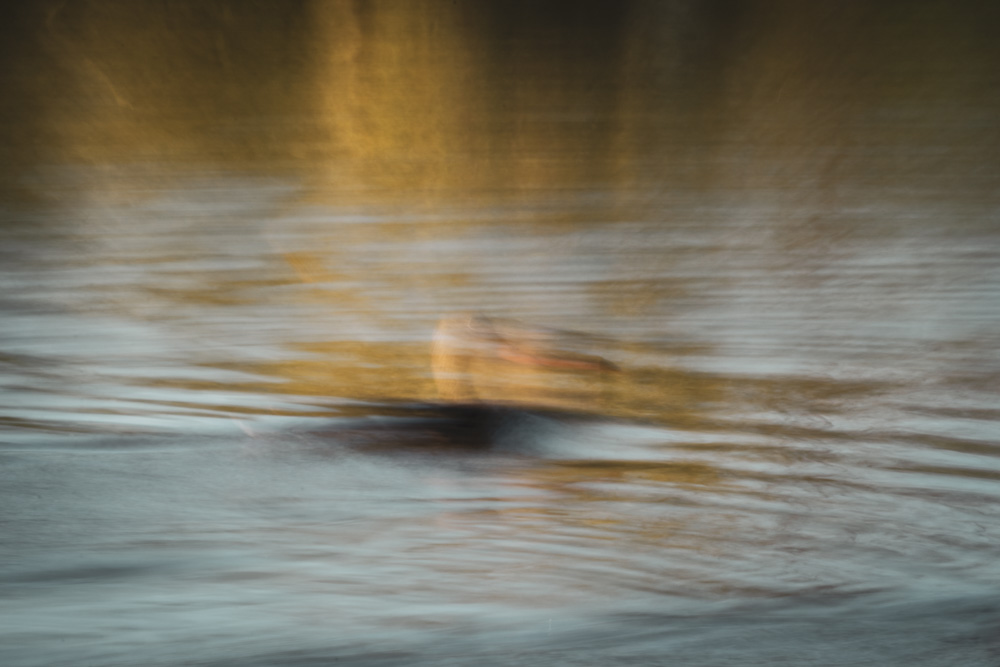
5. Exposure Blending
This impressionist technique is a bit of a combination of the intentional camera movement and a simple exposure blending.
In the image below I combined brighter exposure for the leaves and trunk, darker exposure for the sky (to avoid overblown highlights) and a couple of “wiggly” ICM images to add softness and “brush strokes”.
Then I combined all the photos in Photoshop. First, import them as layers and then go crazy. Experiment with their opacity as well as blending modes!
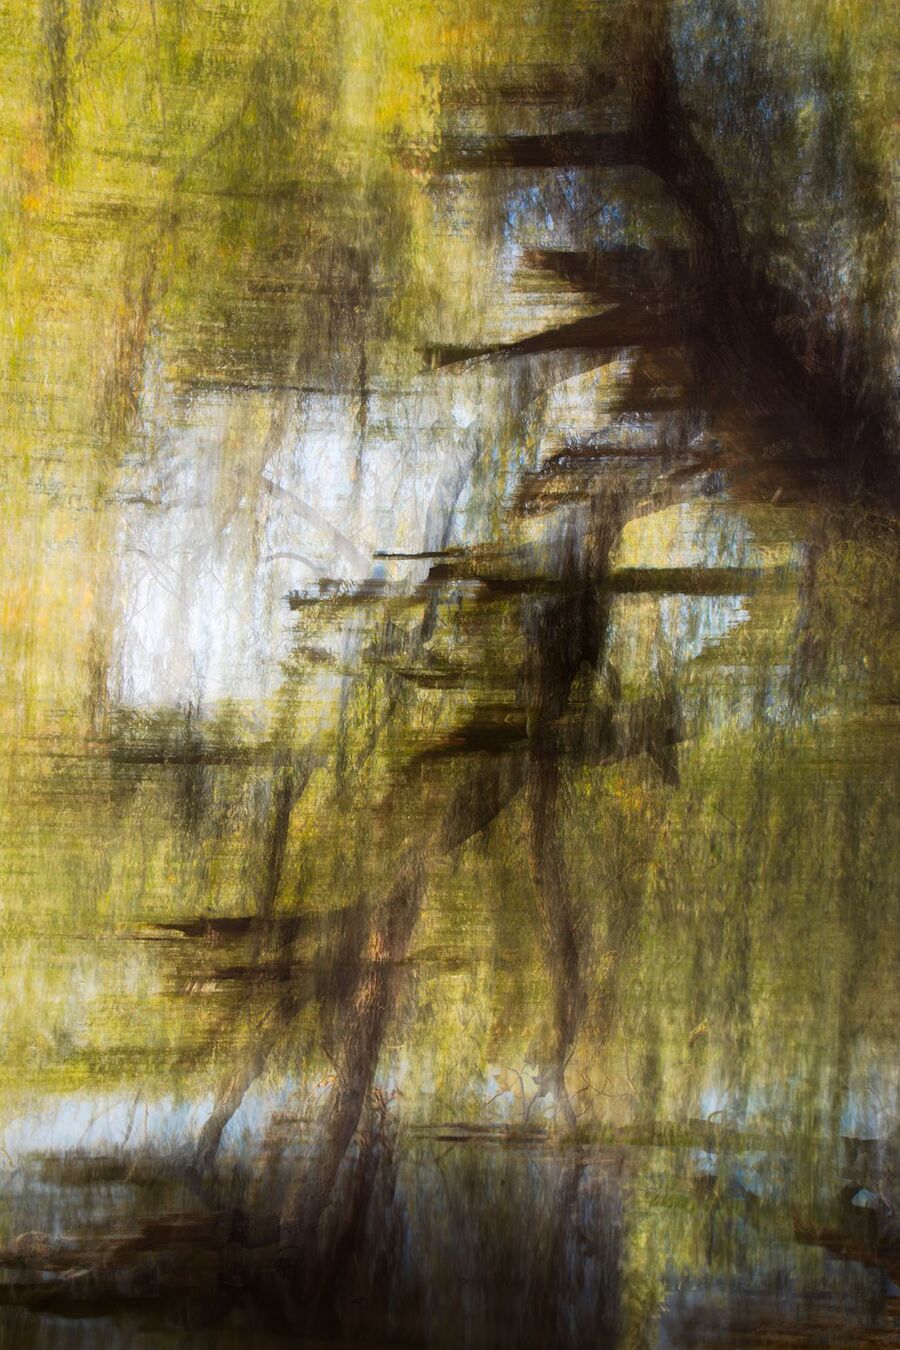
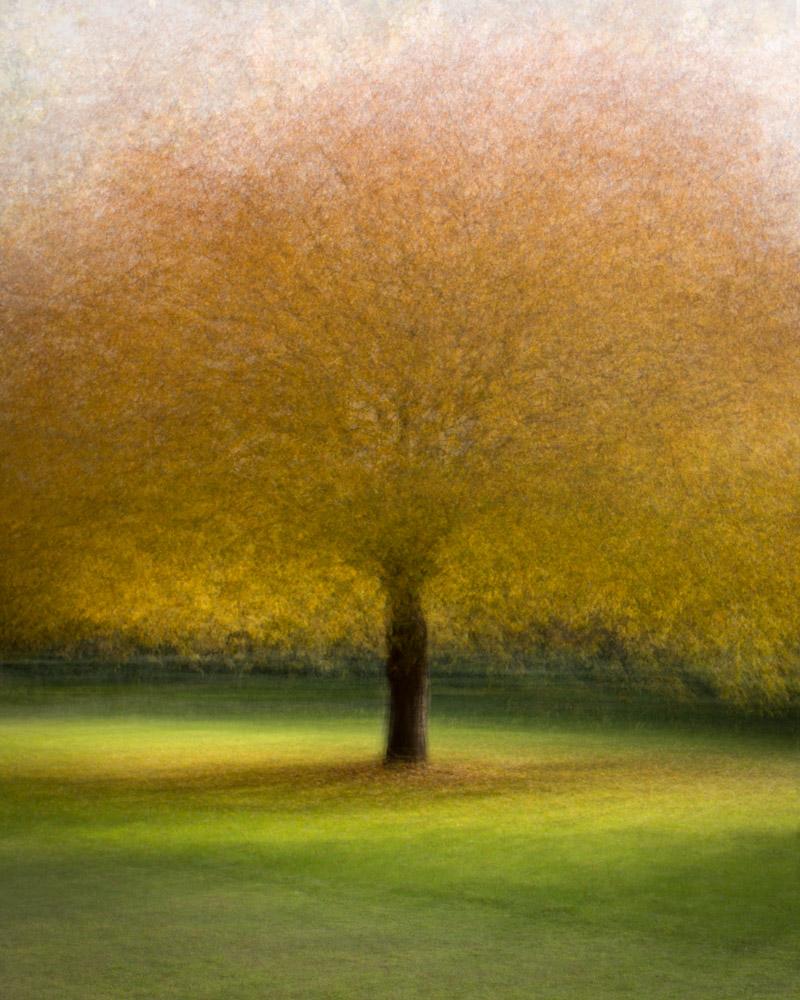
6. ‘In the round’ impressionist technique
This unique impressionist photography technique is my favourite. I mean – look at it, this is about as close to a painting as photography can get!
How to do it? It’s actually quite simple. Unlike the exposure blending above, for an “in the round image” you need to change your perspective.
Step I: On location
Remember that legendary opening scene from Matrix? The one where the camera goes around Trinity while she’s airborne?
This is a bit similar. Only the result is not a couple of cracked skulls but a pretty cool impressionist photograph.
I created the image below by taking 26 images of this beautiful tree. Each one from a different angle of a circle:

Now, notice that I tried to keep the trunk in the middle, the whole tree in a similar position of the frame. Also, this tree is quite a strong subject, well separated from its surrounding. Just like in woodland photography, look for simplicity!
And last but not least – this time all images are sharp, no unnecessary blur (though feel free to experiment with that!). It’s easy to create pure chaos with this technique. So just keep that in mind.
Step II: Photoshop
Once you’re satisfied with your image set (you probably won’t need more than 30), import them as layers into Photoshop.
Here comes the fun part! Disable all layers except for the bottom one – that’s your base with 100% opacity.
Now go through the layers one by one until you get to the top layer. Check the position and scale of each layer, adjust when necessary and set the layer opacity somewhere between 5% and 60%
Then you can add an adjustment layer to add some contrast, etc. or import to Lightroom and do the final adjustments there.
I talk about this technique in more detail here.
BEAR IN MIND: Importing 30+ high-res RAW files to Photoshop as layers is pretty intense and requires some serious computing power. You’re also likely to get over the file size limit. Consider using JPEGs.
7. Daring Impressionist Edit
This is not really a technique but rather a piece of advice:
If you want to achieve an abstract feel through your edit, think of anything you can do differently in the process.
Completely change the colours in the HSL section (Hue-Saturation-Luminance), rotate and flip the entire composition? Using infrared filters and blending modes? Sure, why not?
Give your creativity absolute freedom!
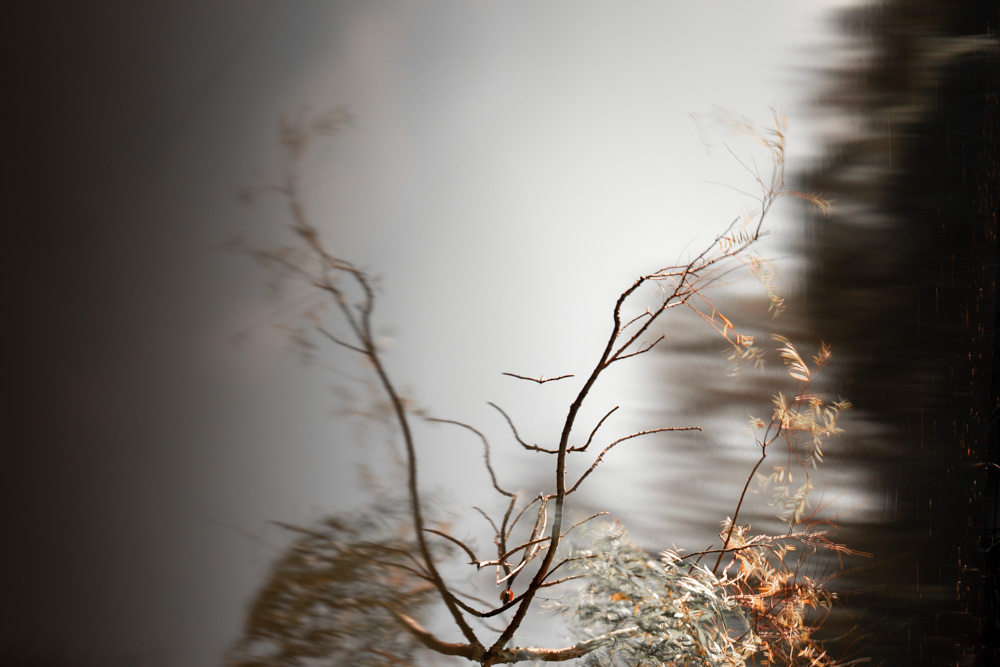
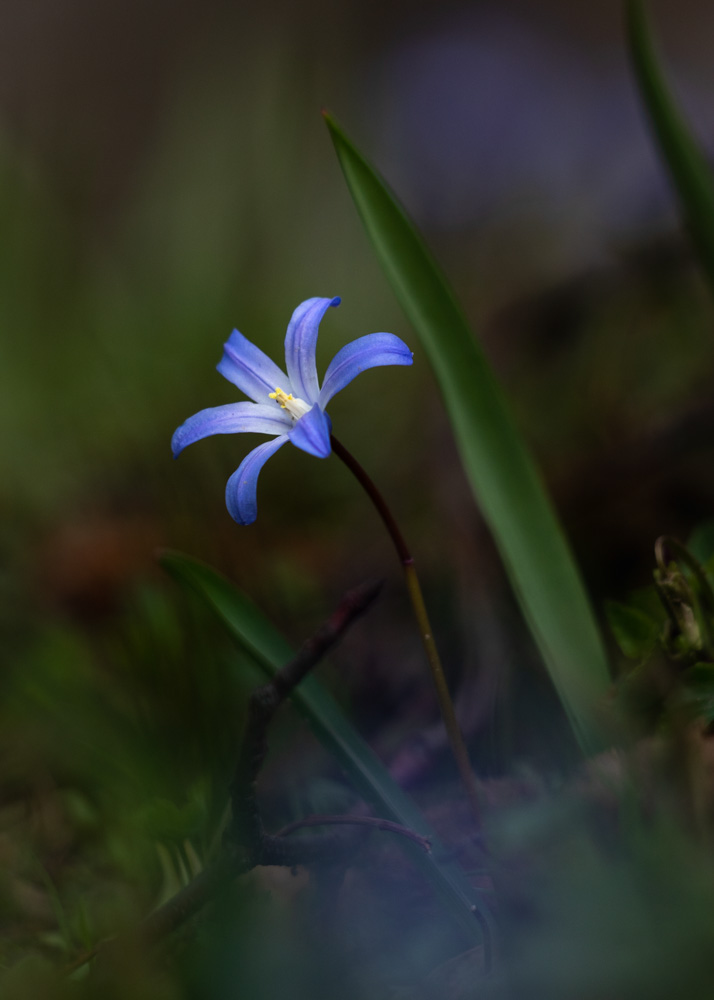
8. Selective Focus & Focus through
I consider these techniques as one. It consists of playing with focus and with the illusion of depth. The goal is to have only a small part of the image in focus, while the rest of it is soft and creamily ‘bokeh-ed’.
Usually, people only use the background blur (when everything behind your subject is blurred). But when working on abstraction with selective focus, try to include also some blur in front of the subject, a.k.a. foreground blur.
Use grass, leaves, petals, etc. very close to your lens to achieve this effect. It will add some extra depth and abstract qualities.
It works best in macro photography. However, you don’t need a special (and very expensive) macro lens. A fast lens (with a wide aperture ca. f1.8 – f3.2) work really well. This cheap Canon 50mm is out of this world!
But even a “normal” long lens can serve you very well here – longer focal lengths provide basically the same effect of depth!
I created the image below using my 70-300 mm lens with f5.6!
Missing something? Let me know in the comments!
Pin this for later:


SO COOL! Very interesting article. Thank you!!
Thaaaanks!!!
Well written and so inspiring! Thank you so much.
Thank you! Glad you liked it!
Beautiful,special,suprise.I rarely to see these photos.
Very inspiring. Thank you
I need to get this creativity on!
Excelent
I use a lot of these techniques and I never did try no 6 – the one where you have done a careful blend of images… the effect is just so cool. Will definitely give that a shot. Thank you for sharing.
Very interesting technique and subjects —using same Canon camera as mine
I live in Central Africa –cannot wait to experiment on big game !