
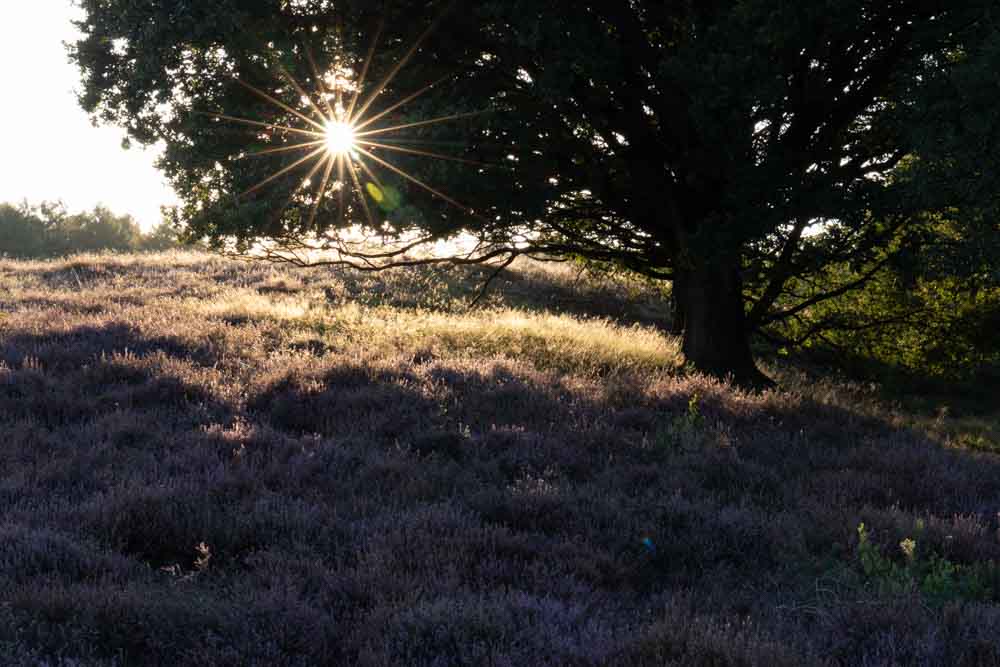
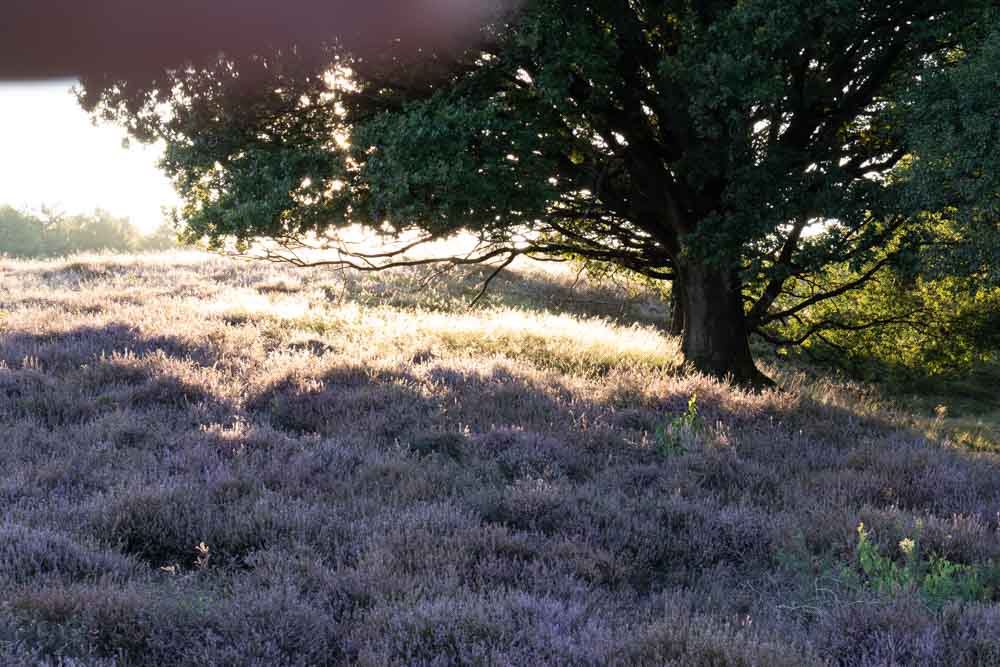
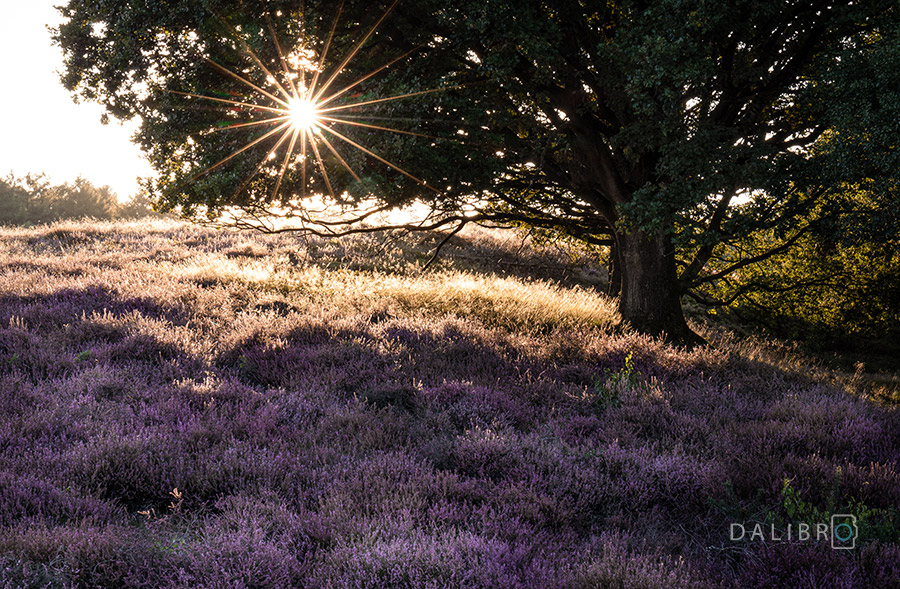
Let’s admit it – we all love sunstars. There is something very appealing about the way they completely transform the scene you’re photographing.
And it is a cool little extra that you can add surprisingly simply to your landscape photography. Shooting in a full-auto mode will make a sunstar rather randomly, as your camera decides about the settings.
But if you know when sunstars occur in the first place, it is a piece of cake to actually add one to your image.
Table of Contents
Disclosure
#1 When do the sunstars occur?
Those pretty sunstars in photos are caused by something called lens diffraction. It is quite a complex topic and I can highly recommend watching this excellent explanation by Fstoppers.
But the general idea is – the smaller the aperture, the better is the chance of creating pretty sunstars. And it doesn’t have to be the sun. In fact, you can experiment with other light sources that aren’t 150 million km away!
What I like to use as an explanation is the example of the best lens ever made – your own eye. If you look at e.g. a light bulb, all you can see is the light source.
But check out what happens if you start squinting (a.k.a. decrease the aperture) and almost close your eyes! There they are – the light rays.

Subscribe now and get my free ebook straight into your mailbox!

Now you may think it would be a great idea to go for the highest possible f-number (=lowest aperture). However, as everything in the photography trinity, too small aperture comes at a price – it causes the lens diffraction so strong that it negatively impacts the overall sharpness of the image.
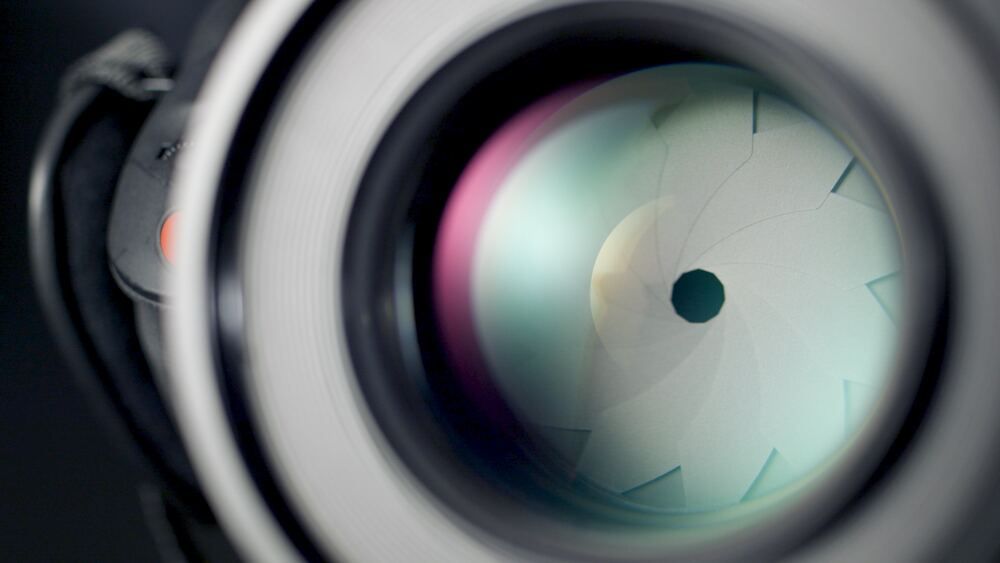
Also, the lens you use has a big influence on the results, more precisely the number and shape of the aperture blades.
An even number of blades will give you the exact same number of rays, an odd number of blades will double the number of rays.
#2 The best camera settings for sunstars
First things first – a better camera doesn’t necessarily mean better sun rays. You can achieve the goal with pretty much any camera where you can control its aperture.
Second things second – don’t get discouraged by the challenging dynamic range and that the image doesn’t look perfect straight out of the camera! I will talk you through the camera settings in this chapter and also show you some editing techniques in the last one.
Focal length
With a bit of experimenting, you’d probably find out on your own how the focal length impacts the qualities of your sunstar.
As I wrote earlier, you’re trying to squeeze the sun through a tiny hole of the aperture to achieve the desired effect.
So logically, zooming and filling the entire frame with the light source will be rather counter-productive. And potentially damaging your camera’s sensor. So just do not zoom in too much, OK?
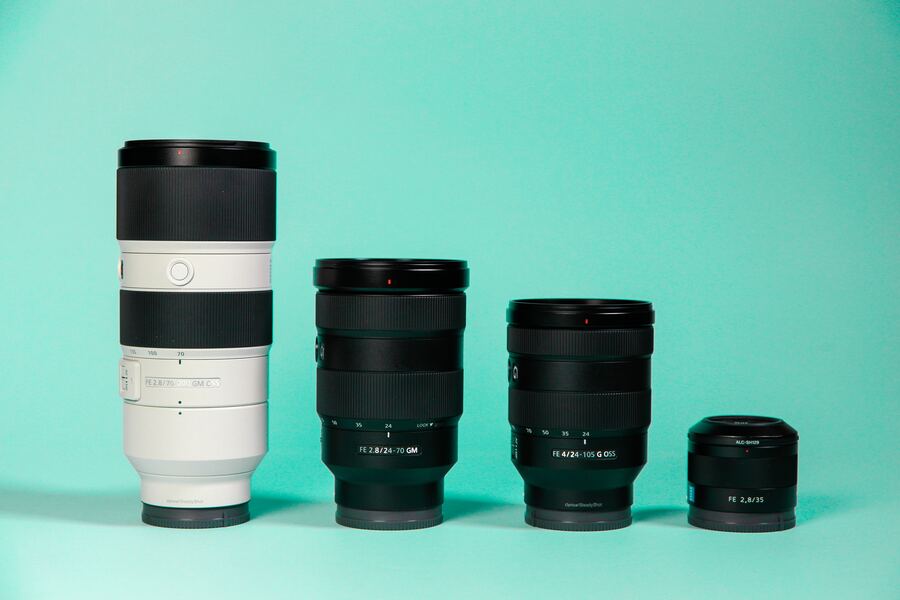
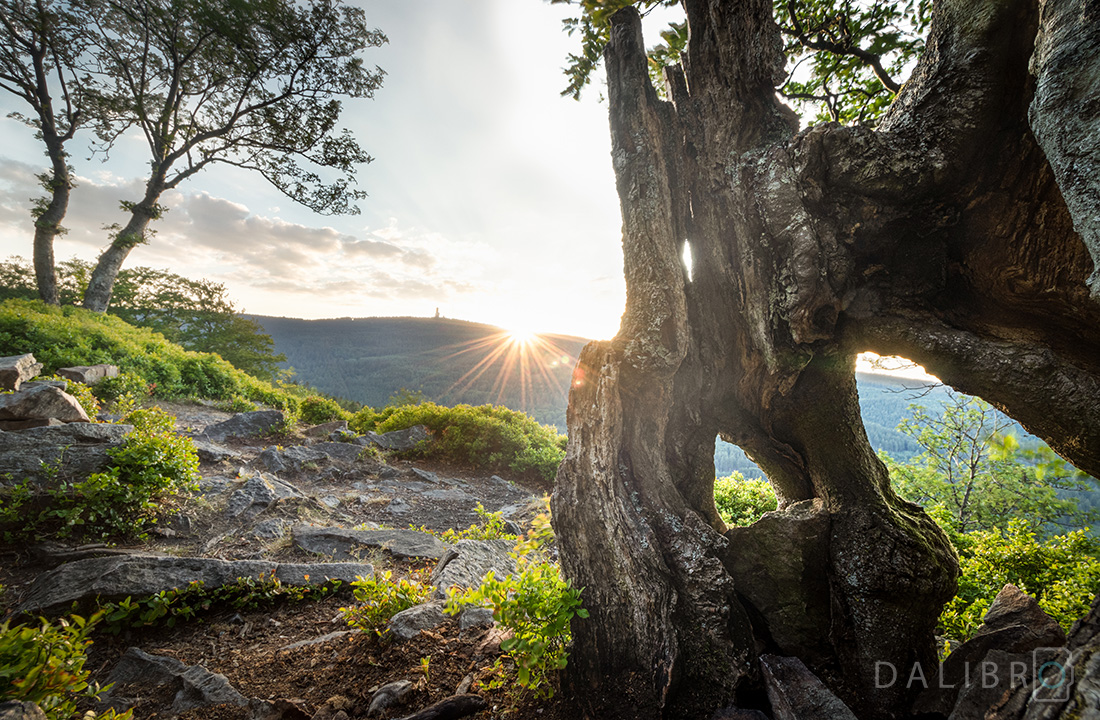
In fact, I’ve achieved the best results with rather wide lenses. Most of the sunstars in this post were taken with my 10-18 mm. I like the flexibility it gives you in terms of composition – you can play around with the placement of the sunstar and it’s great for balancing the image.
But don’t despair if you don’t have an ultra-wide! You can definitely use more universal lenses, like the landscape photography classic – 24-70 mm.
Focus when shooting a sunstar
Focusing might be tricky when shooting against the blinding sun. I definitely recommend using manual focus I described earlier. Also, as I normally take at least 2 images (one for the sun, one for the foreground), I focus twice.
The rule of thumb is – focus at whatever you’re exposing for.
Aperture for creating a beautiful sunstar photo
You’re going to take at least 2 exposures with two different aperture values:
A. Expose for the sunstar (small aperture = high f-number)
By now it is obvious that the key to creating beautiful sunstars is using a very small aperture. I usually start with something like f16 and work my way up to f22, depending on light conditions and what I want to achieve.
While setting up for your sunstar exposure, observe the histogram on your screen. What you really don’t want is blowing up the highlights.
If the histogram touches the right vertical axis, you need to shorten your shutter speed, reduce ISO or reduce the aperture even more.
Don’t worry about the very underexposed foreground for now! That’s why we take the next exposure.
B. Expose for the foreground (‘normal’ aperture)
Take another shot where you expose for the foreground – adjust the aperture to some reasonable landscape photography level (probably somewhere between f8 and f13), use longer shutter speed or increase ISO until you’re satisfied with how the foreground is exposed.
This time, you’ll see that the sun and sky are most likely completely overexposed but that’s OK for now.
Just focus on your foreground. Keep an eye on the histogram again and watch out for little shiny things like puddles or leaves that can easily burn white spots in your exposure. I like to use a polarizer to help me take care of these.
This is also a good moment to take one more shot (with the same exposure settings) while shielding your lens from the sun until you can see no lens flare.
Now you have at least two images that you can blend together in Photoshop (keep reading to see how to do it).
#3 Lens flare – ditch it or keep it?
While shooting against the sun, you will inevitably get some lens flare in your image. You have probably noticed that a camera lens may consist of multiple lenses and other elements (especially zoom lenses have some Terminator qualities these days).
The light gets kind of stuck in them as these lenses reflect each other, causing those weird circles, specks, circles, hexagons and spots in your image. Yeah, enough of this…ehm, ehm… explanation.
The main question for you as an artist is – do you want to keep it in or get rid of them? There are situations when lens flare creates drama, some sort of a sci-fi feeling to the image.
Then it’s more than OK to deliberately keep it in (or even add lens flare in the editing process!).
I personally like to remove the lens flare as I mostly find it unwanted and distracting. However, I don’t mind a tiny bit of realism and sometimes keep a circle or two in my final image.
How to get rid of unwanted lens flare?
If you’ve decided that you don’t want the lens flare in your composition, there are basically only two options:
A. Use a lens hood
I include this option but the truth is that a lens hood won’t help you when shooting sunstars. Though, I still find them very helpful when the sun is just out of the frame. Then they really do protect from the lens flare.
B. Take multiple images and combine them in post
I wish there was a better solution but I don’t think there is. When you photograph sunstars, the best thing you can do is to take several images.
Not only for the sunstar and for the foreground but also at least one image when you cover / shade from the sun and get rid of the lens flare.
Use the live preview screen to see what you’re doing.
The magic then happens in Photoshop, where you can merge these various exposures together and mask the unwanted flare out using the “sun-covered” image.

C. Remove it in Photoshop
My least favourite option is removing lens flare in the editing process. Small specks are usually quite easy to remove using either clone stamp tool or the content-aware tool.
However, that large circular sort of green-ish lens flare? Absolute pain to remove, so make sure to take extra exposure without it!
# 4 Processing Sunstars in Photoshop (blending)
A. Choose which images you want to use and open them as layers in Photoshop
There will probably be one with a correctly exposed and focused sunstar, one with correctly exposed and focused foreground and potentially one with correctly exposed and focused foreground without lens flare.
You may, of course, have more images to take care of different issues or to support your creative idea.
If you use Lightroom for organizing and editing, you can also open the images as layers in Photoshop from there.
I personally like to remove chromatic aberration and apply the lens profile for all images imported into Lightroom before I start any other edits. Personal preference, nothing obligatory.
B. Align the layers in Photoshop
This is a crucial step – even as a proud owner of this beast tripod with its beast ballhead, there is always some movement between the shots.
Layer align is a smart tool that makes sure every shot is exactly on top of each other. Remember – neglecting this step will lead to some very awkward effects later! Go to Edit >> Auto-Align Layers in Photoshop.
C. Start blending the layers
Here comes the meat of the whole process – masking! There are tons of methods for that but if you’ve never done it before, consider starting with the simplest one to get the feeling of how the whole thing works.
Select the top layer and click on the mask icon:

Then make sure you’re in the mask and select the brush tool. Notice that by default it has two colours – black and white. White in a mask represents 100% opacity, black represents 0% opacity. So if you draw a black circle in a mask, it means you can see the layer(s) underneath through this circle. And vice versa. See where we’re going with this?
This tool enables you to “paint in” the best parts from each image and so create a blend of them.
So, in this case, you will paint in the beautiful sunstar from the low aperture shot and the well-exposed foreground from the normal shot. And if you took another foreground shot with the sun shielded, you can paint out the lens flare using that one. Isn’t it amazing?
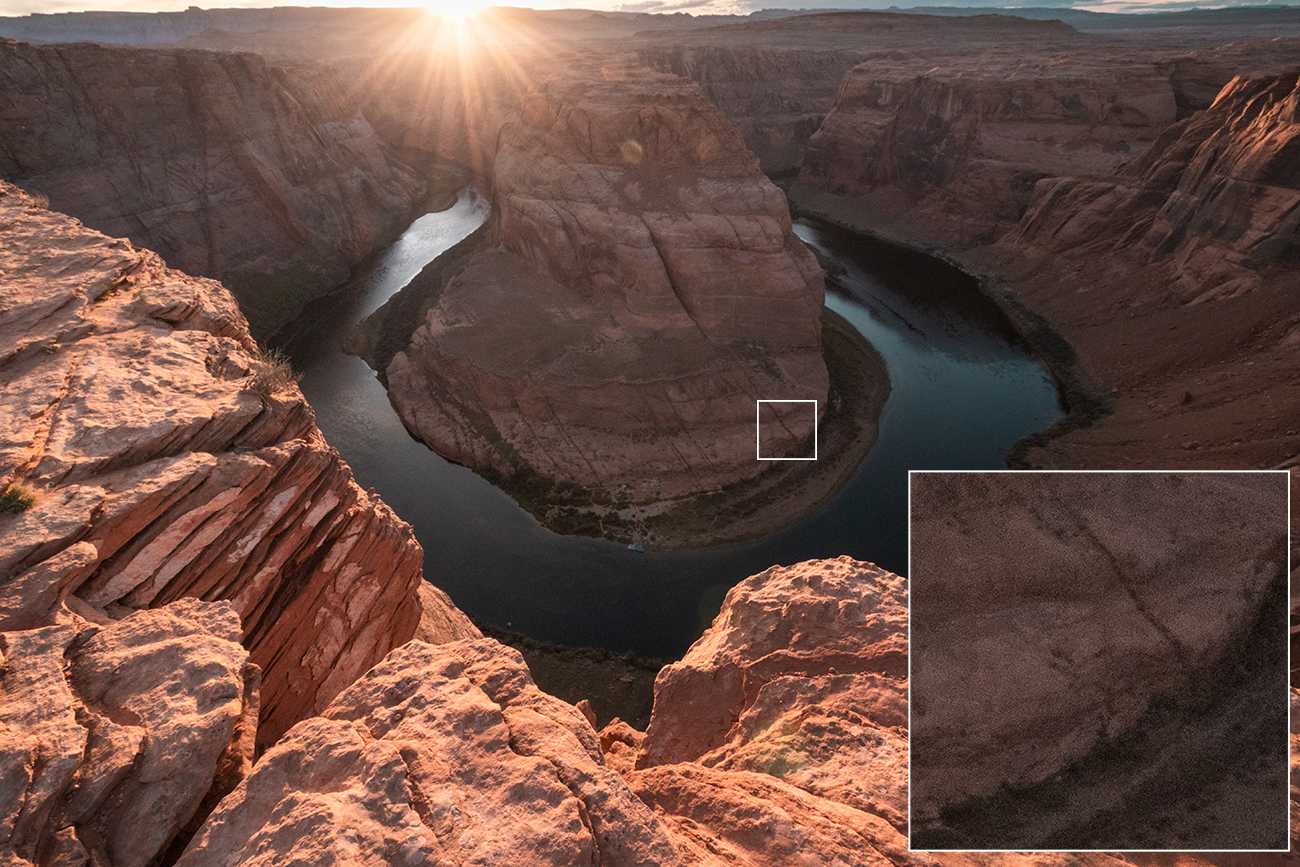
#5 Can you photograph sun rays in a single exposure?
By now, you might think exposure blending in Photoshop is the only way to go. But you can also shoot sunstars without a tripod and in one single exposure.
The key is the capability of RAW format. While shooting with a small aperture, take care of our old friend histogram. If you don’t blow up your highlights and the darks aren’t completely black at the same time, you will be able to save the image in Lightroom. Quite some noise will be introduced and the sharpness probably won’t be great.
But hey – is it enough for Instagram, Pinterest or your travel blog? Hell yeah!
Do you have any other tips about shooting sunstars or exposure blending? Let me know in the comments!
Pin this for later:


That is AWESOME! Great article!!
Gracias! 🙂