
There is no way around it – The Grand Canyon, Arizona is not only insanely beautiful but also insanely large. In fact, you can enjoy ca. 450 km (270 miles) of this natural wonder. Its average depth is around 1600 m (1 mile) and it is up to almost 30 km (18 miles) wide. Seriously, nothing can prepare you for the scale and beauty of this place. Just a few fun facts for the start.
Table of Contents
Disclosure
If you think about the size, it quickly becomes obvious that the opportunities for visiting and photographing the Grand Canyon are literally endless. There is no such thing as a perfect itinerary or the best way of fully discovering it.
However, I hope this article will help you in planning your own adventure and provides you with some useful information specifically for the most visited part of the National Park – the South Rim, which gets around 90% of the park’s visitors.
Quick overview of the Grand Canyon’s Rims
Although there are some off-the-beaten-path options for visiting the Grand Canyon, these 3 options are what you’ll need to consider.
1. The West Rim & Grand Canyon Skywalk
This is the best option for those who want to see the Grand Canyon but have no time. The main advantage of the Skywalk Viewpoint is that you can get there in only 2-3 hours from Las Vegas.

Subscribe now and get my free ebook straight into your mailbox!
The Grand Canyon Skywalk does not lie inside the National Park but on the Hualapai Tribe’s land from which you can see the western part of the Canyon.
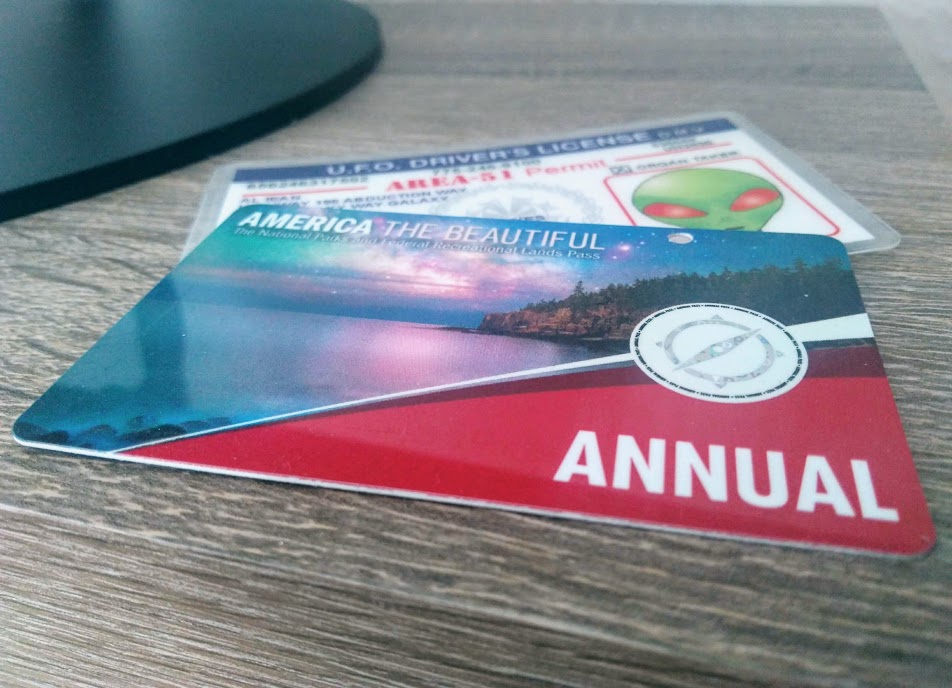
In my opinion, it is a bit overpriced – the cheapest tickets that include the bridge are currently 62 USD per person. Considering that the Annual Pass for America’s most beautiful National Parks will cost you 80 USD per vehicle.
The Skywalk is definitely no good option for photographers – you are not allowed to bring a camera or even a smartphone on the bridge. Let aside tripods. And yet, a great option if your time in Las Vegas is very limited.
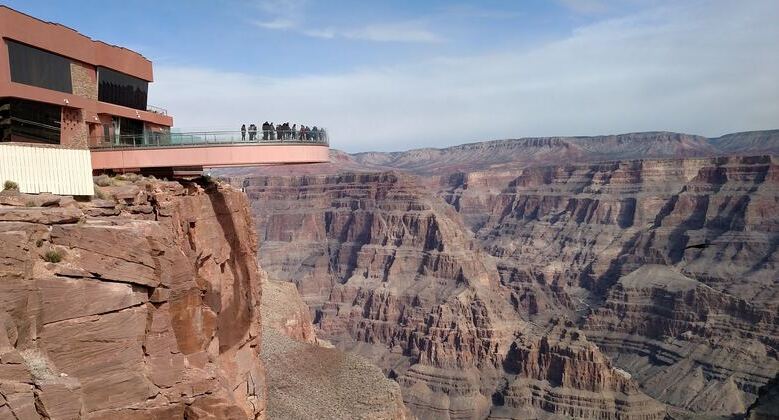
The Grand Canyon Skywalk offers some unique views of the West Rim; Credits: Photo by Stan Lawrimore
2. The North Rim
The North Rim lies just on the opposite side from the South Rim but far more remote compared to its south brother. It is also much less visited but offers some stellar (and less known) views of the Grand Canyon.
However, the season runs only from May 15 to October 15 every year and the lodging is more limited than on the South Rim side.
It may be interesting for you if you don’t plan to go south from the Grand Canyon. Get your free North Rim Pocket Map here!
3. The South Rim
As mentioned earlier, the South Rim is the most visited part of the National Park. Rightfully. The views are phenomenal and the viewpoints countless. But there is also very good infrastructure, bus shuttles, huge parking areas (which get filled quickly anyway) and quite a lot of lodging.
There are hotels and restaurants in the near town of Tusayan as well as in the Grand Canyon Village. The Village sits literally on the rim but staying in Tusayan will save you some cash and it really is only a few minutes drive to the park gate.
Get your free South Rim Pocket Map here!
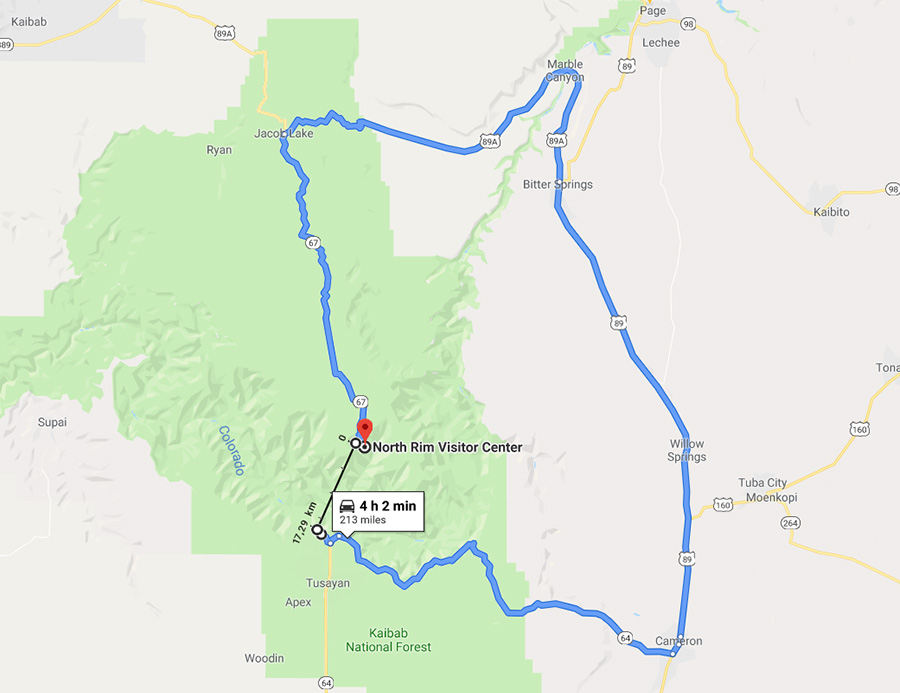
Tip: Knowing where the Grand Canyon’s hotspots are, how to get there and how long it will take is essential for planning your trip. You’ll be visiting one of the largest canyons on Earth – for example in a straight line, the distance between the South Rim and the North Rim is only 17 km (11 miles). However, in order to travel from one to the other, you’ll have to drive for about 4 hours all the way around the canyon system!
How to get to the South Rim, Grand Canyon from Las Vegas
Yes, there is an airport in Tusayan. But unless you’re a movie star or Elon Musk you will probably not be willing to pay the preposterous prices for the “Air Taxi” tickets.
Luckily, there is a four-wheel alternative. What you need to do is head out of Las Vegas to the south, direction Boulder City and Kingman (Highway 93). If you’re interested in the Skywalk, turn in Dolan Springs.
Tip: If you have time, have a stop in Boulder City and make sure to visit the Boulder (Hoover) Dam Museum and the Boulder Dam itself. You’ll get the best view if you stop at the Boulder Dam Bridge Parking and do a short walk to the viewpoint. Do not attempt to stop your car on the Hwy 93 bridge to get to the viewpoint!
When you get to Kingman, continue in direction of Flagstaff (Highway 40) or do a little detour, tune Chuck Berry and get some kicks on the legendary Route 66. Then join the Hwy 40 again in Seligman.
In Williams, get on the Rte 64 to Tusayan and the Grand Canyon. The trip from Vegas takes at least 4-5 hours so plan accordingly.
Things to see and do on the South Rim
1. The Entrance to the National Park
The entrance station is located about a 5-minute drive from Tusayan. Arrive early or later in the evening to avoid long lines. This is the place where you can buy a ticket from the ranger, or show them your ticket together with an ID.
If you’re planning a trip to 3 or more National Parks, the annual pass “America the Beautiful” is definitely what you should purchase. It cost 80 USD per car in 2019 and it’s worth every penny. There’s no need to buy the annual pass in advance as these are offered in so many stations.
The gate is open 24/7 but it is not manned around the clock.
A big shout-out to all the rangers, staff and volunteers working in the Grand Canyon National Park (and all other parks, too). What they do is remarkable! Just wanted to mention that.
2. Visitor Center
Driving further north will get you to the Visitor Center. Bathrooms, drinking water to refill your bottle, exhibitions about the Grand Canyon, ranger programs, souvenir shops – the GC Visitor Center has all you’d expect.
It is also a traffic hub where 3 out of 4 bus lines start / end. Read about the bus system later in this post.
A 10-minute walk from the Visitor Center will get you to the Mather Point. This platform offers a stellar 180-degree view of the canyon.
However, I personally didn’t find the Mather Point very enjoyable – there are hundreds of people flowing in and out for most of the day. Yes, it is a must-see but there are tons of much calmer places on the rim offering not only beautiful views but also some more peace and quiet.
3. The Rim Trail
The Rim trail is the most popular hike is the Rim Trail. It is, in fact, a very comfortable, paved path on the rim of the Canyon.
My first thought was that I’d like to experience something more “off-the-beaten-path”, rather than just comfortably walking around the easiest trail. However, the Rim Trail totally won my heart as it offers countless spectacular views of the canyon.
It is also pretty long so you can spend anything between an hour and the whole day on the trail.
Last but not least – it is perfect for photographers as there are many corners where you can relax and work on your composition almost alone.

4. Yavapai Point
One of my favourite parts of the Rim Trail is the bit between Yavapai Point and Verkamp’s Visitor Center. Yavapai Point has its own parking area (despite the map above saying something else :D) but it’s enough only for a couple of vehicles. Great for sunset and sunrise.
This part of the trail offers many larger and smaller natural viewpoints along the way and a couple of benches to let it all sink in. You can also observe geology exhibits here.
If you like to shoot panoramic images and use longer lenses, you’ll definitely enjoy this bit.
5. Market
The Market is a good logistic stop rather than some splendid viewpoint. There is quite a large parking lot, a bank, a post office, toilets, and a big store. Not only you can buy snacks and coffee there but also pretty much any piece of outdoor equipment that you might have left home.
The Market is a good parking option if you want to get on the Rim Trail somewhere “in the middle” (see above).
6. The Village
The Grand Canyon Village is a historic town fully focused on accommodating tourists visiting the canyon. So you can find hotels, shops, historic sites and even a train station.
The village is a bit crowded and I certainly wouldn’t call it a must-see but who am I to judge? The views from the rim are still amazing and staying in one of the hotels right at the Canyon’s rim must be an amazing experience.
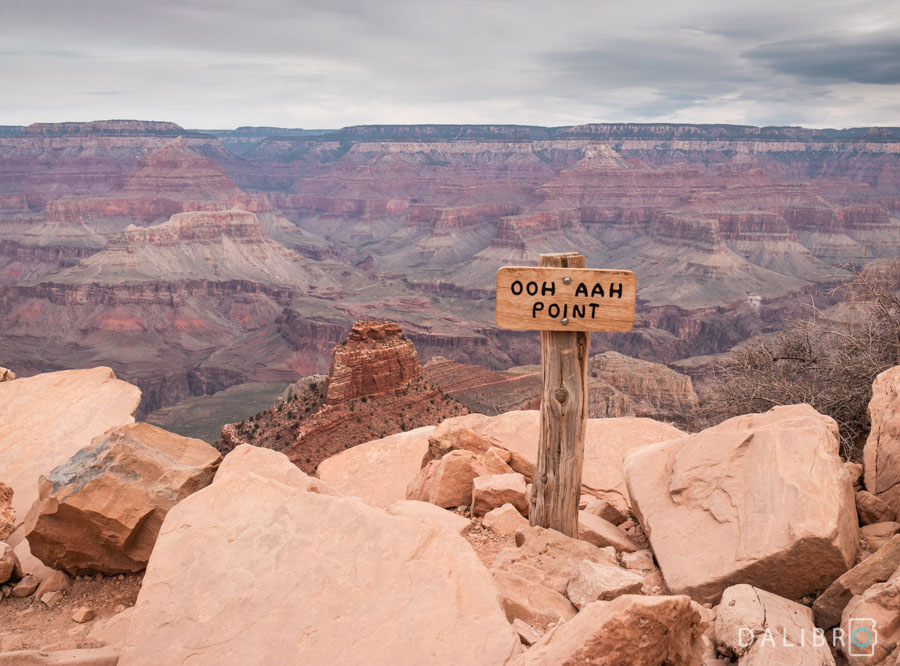
7. The Ooh-Aah Point on the South Kaibab Trail
The famous Ooh-Aah Point can be found on the South Kaibab Trail. This Trail actually leads down into the canyon up to the bridge over the Colorado River and then it continues as the North Kaibab Trail towards the North Rim.
And the first stop on this epic trail is the Ooh-Aah Point. It is definitely worth seeing as nothing compares to the feeling of slowly descending into the magnificent Grand Canyon. The Ooh-Aah Point is a turning point for many hikers. Including myself. I think it is a good idea to save some strength for other parts of the canyon. Especially in summer!
The South Kaibab Trailhead is a Yellow Line Bus stop east from the Visitor Center. Hop on the yellow line, direction Yaki Point.
Tip for photographers: Unless it is your life’s ambition to shoot from this specific place (or lower on the Kaibab Trail), do a pre-selection of what gear you’ll bring with you. Take only lenses that are necessary, only one extra battery and either no tripod or just a light mini-tripod. Every gram counts, you’ll be better off with extra snack or water!
8. Bright Angel Trail
Another cool hiking experience within the Grand Canyon National Park is the Bright Angel Trail. Its trailhead is right at the start of the Red Bus Line in the West.
This trail is the other one that can get you down to the Colorado River. But similarly to the South Kaibab Trail, you can hike down to the canyon just a bit, enjoy different perspectives and then hike back up.
The Bright Angel trail is well maintained and not as remote as the South Kaibab Trail. There are two rest houses on the way down, offering a bit of precious shade, water and toilets. If you make it to Indian Garden, there is water, toilets as well, plus a campground.
Tip for photographers: Same thing as for the Kaibab trail – pack as light as possible. If I had to pack again, I’d go for one lens only – the longest one. The descend uncovers some new perspectives and details in the landscape that you couldn’t see from the rim. You might need to increase your ISO to allow higher shutter speeds if you go for a long lens and no tripod. Supposing you only go for a day hike, it’s a fair trade-off.
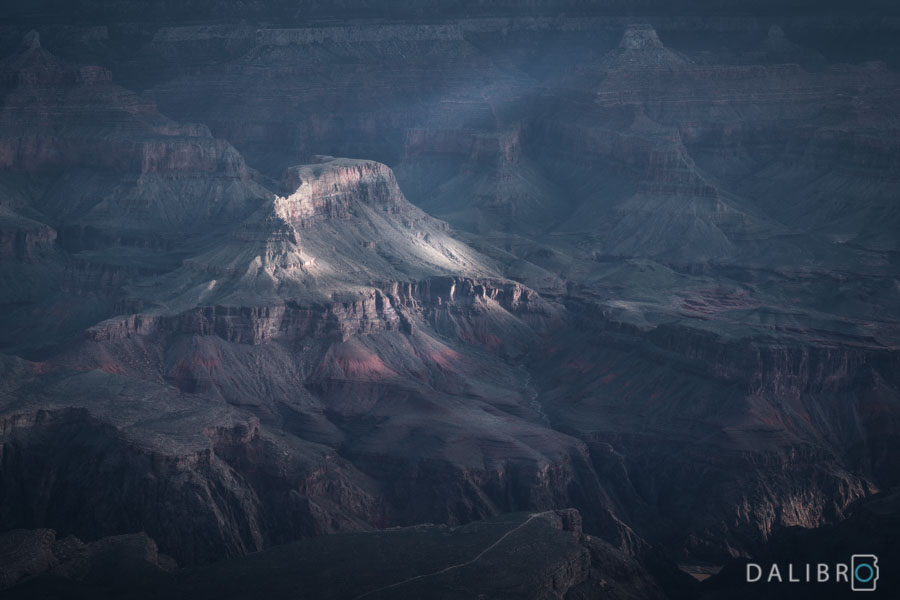
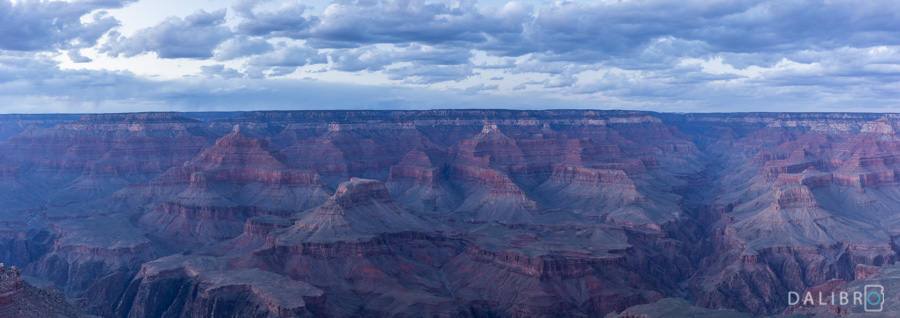
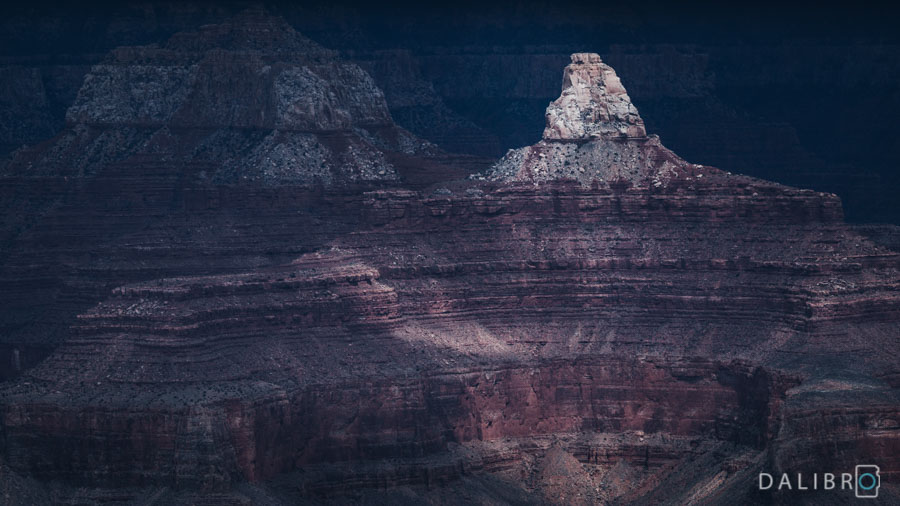
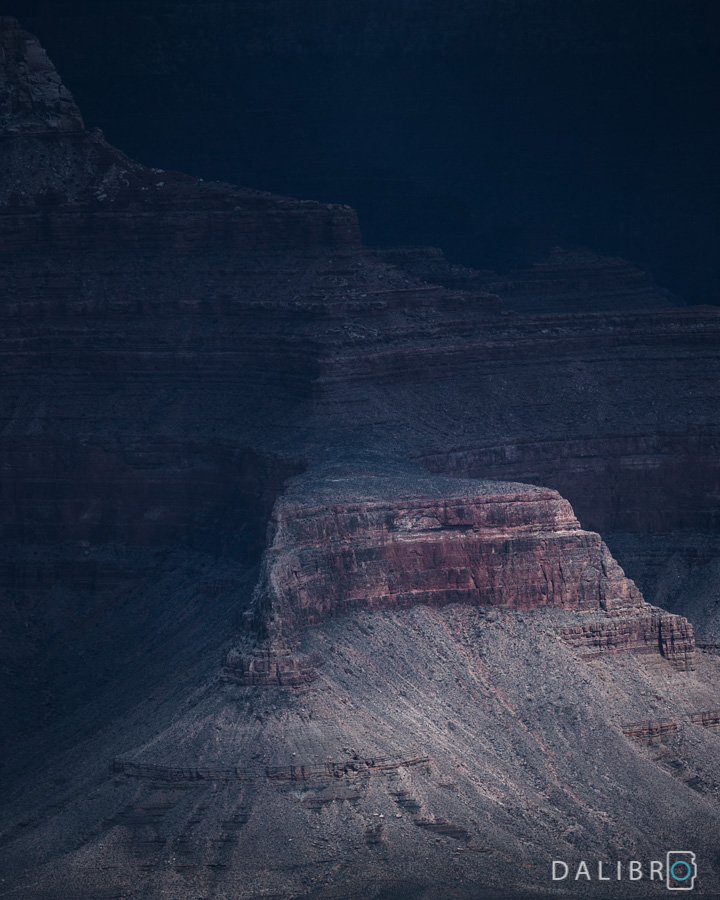
We had great luck with the weather while on the trail, as there was a sudden storm. Nothing major – it pretty much came and went. But all those patches of darkness and light travelling across the massive Grand Canyon? A pure joy to watch for every human being! And an amazing moment for a photographer. I assembled a mini collection below called simply “Storm in the Grand Canyon” that is also available as prints for sale.
My camera settings for these conditions
All three images were taken handheld at 1/400 to 1/800 of a second and image stabilization on to keep things nice and sharp. ISO somewhere between 160 and 400. As I didn’t care so much about the aperture, I was shooting in Tv mode (= Time Value or Shutter Priority). It doesn’t happen often but I had a very specific type of dark edit in mind already on location. Heavier processing than usual in order to emphasize the story. 🙂

Hiking tips: Pack light, bring plenty of water and salty snacks, use sunscreen and rest as often as your body demands. The South Kaibab Trail and the Bright Angel Trail are both remarkably demanding hikes and you should not even think of hiking down to the river and up in one day! Even if you’re hugely experienced and trained. Also, be prepared for extremely hot temperatures, get on the trail as early as possible. Check out further tips here.
9. Desert View Drive to Page, AZ
The chances are, you want to continue further north to Page to marvel at the otherworldly beauty of the Antelope Canyons. The best way to get there from the Grand Canyon is via the Desert View Drive! Once in the Park, follow the signs to Cameron (Rte 64).
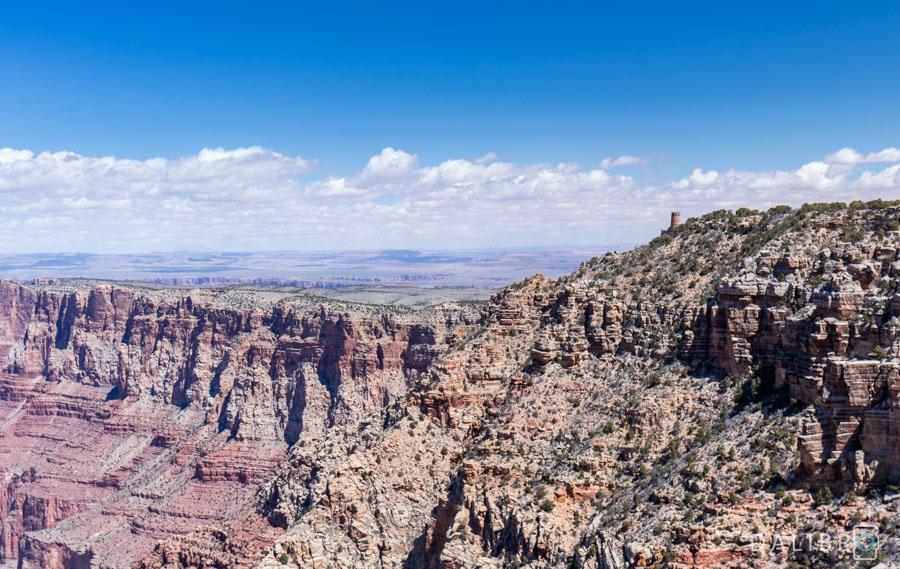
It is not only the shortest way from Tusayan but it also gives you the chance to enjoy even more amazing vistas (Grandview Point – my favourite, Moran Point, Lipan Point, Navajo Point and finally the Desert View Watchtower). After the Watchtower, you’ll exit the National Park.
So dedicate some time to enjoy all these bonus viewpoints and don’t miss this amazing drive. It’s time to say goodbye to the Grand Canyon!
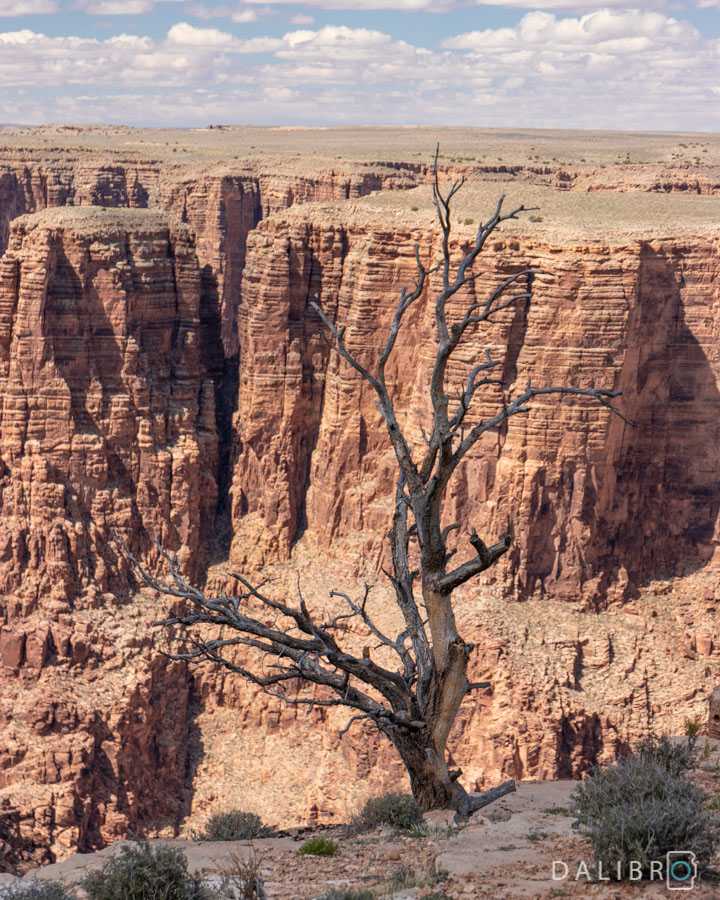
Or is it? 🙂 About 20 miles (35 km) from the Desert View Entrance Station, do not miss the signs indicating the Little Colorado River Gorge Overlook. Little Colorado flows into ‘normal’ Colorado. Which means, technically, it’s still part of the Grand Canyon system.
The Overlook is a short walk away from the parking and offers views that are way different from the GC. Hence, my secret tip!
Getting around the Grand Canyon National Park
Alright, this might be a bit tricky for the first-timers. The general simple rule is – arrive early in the morning (or later in the evening) to avoid crowds.
1. Parking and the Free Shuttle Bus Service
There are so many visitors, that a Park & Ride system is actively promoted by the rangers. In other words – get in, park your car somewhere, leave it there and use buses to get around.
The parking lots get filled around midday or early afternoon. The lot at the Visitor Center can get full around 10 a.m. already (depending on the season). If you can’t find a spot at the Visitor Center, try Market.
Top tip: This NPS website should be your #1 source for understanding the park and ride system.
The bus system is fairly simple and the free buses are going frequently. There are 4 lines – orange, blue, purple and red. The first three meet at the Visitor Center. The red one is located in the very West and goes between Village and Hermits Rest. The purple line goes between the Visitor Center and Tusayan.
Get your free South Rim Pocket Map including the shuttle bus lines here!
2. Drinking Water
Now, let’s talk about this one a bit – the park’s drinking water system is exquisite. Considering you’re basically in the middle of a desert – respect! Every larger hub on the Rim has a drinking water tap where you can easily refill your bottles.
This can’t be highlighted enough – PLEEEEAAAASE bring a reusable bottle if you can! So many people carry around those little plastic water bottles. And so many leave them somewhere. That’s right – somewhere on the rim of this beautiful canyon. You wouldn’t believe how many of them we picked up during one single evening walk.
I absolutely LOVE the Dopper bottles – they have great size plus you get a nice cup and a bottle in one. And you can even customize its look!

3. What to pack for your GC trip
There are some obvious things to bring for your Grand Canyon trip – like good shoes, trekking poles, sunscreen, sunglasses etc. These 5 items below are rather complementary, based on my own experience. 🙂
#1 Foldable silverware
This is an absolute necessity for any trip to the United States. Almost everywhere, including some big well-known hotels and bistros, you will be served with plastic knife and fork. Yuck!
Terrifying in terms of waste amount and bad eating experience. Treat yourself with a nice set of travel silverware.

#2 Comfortable camera bag
Chances are that you’ll spend the whole day on your feet outdoors. I do like compact camera bags that open on the backside to reveal your entire camera equipment.
However, those are not the best option for the Grand Canyon. The main issue with them is usually lacking back system and no space for anything besides gear. So you’ll have nowhere to put your water, snacks, a jacket or sunscreen. And all this while suffering from terrible back pain.
Look for a bag with a dedicated camera compartment in the lower part, accessible from the side and a big enough compartment for other things in the upper part. Ideally, it should have thicker shoulder straps and a waist belt which takes a lot of weight from your shoulders. One example is this Lowepro backpack:

#3 Hat
No matter what, you’ll need some sort of sun protection on your head! So why not try out this one with a strong statement?

#4 Waterproof jacket (seasonal)
Depending on when you go, a waterproof / windproof jacket might be a good idea. During our trip in April, the temperatures were falling as low as 0°C (32°F) and we experienced some strong wind and rain.

#5 Gloves with cut fingers (seasonal)
Oh, how I wish I had a pair of these with me for all the photography sessions! The April mornings were so freaking cold my fingers got almost blue. If you travel to the Grand Canyon in winter or spring, bring some gloves, your hands will be grateful!

Photographing the Canyon – further thoughts
1. Time of the day
Sunrises and sunsets are both equally good for photography. When you look at the map of Grand Canyon, you’ll quickly realize that the sun rises on the right-hand side from South Rim’s Viewpoints, and sets on the left-hand side.
I personally found it very convenient, since I don’t do shooting straight into the sun if I can avoid it. What you get instead are hours of beautiful soft light.
2. Photography gear to bring
I was wondering how many photos I took with which focal length. Luckily, Lightroom has the right tool for my nerdy needs:
70% of all images were taken with my trusty 24-70 mm (however, some of them are part of a panoramic shot). This lens is a perfect all-rounder. | |
25% of all images were taken with my long-time long friend 70-300 mm lens. I love picking details in the landscape and create images that probably nobody else has. | |
5% of all images were taken with my crazy wide black-hole-creating 10-18 mm lens. I knew I would use it very little in this grand open space but I found it useful for 2 or 3 occasions. |
I realize how super individual this is (I prefer longer focal lengths). But it may be some food for thought for some of you.
A sturdy tripod is great to have for shooting in the mornings and evenings. These times also tend to be calmer on the rim trail. So you’ll have enough time and space to play around with your composition, relax, enjoy the view and wait for the light.
I also used a polarizer a lot. It gets you rid of the glare and supports the richness of colours.
Last but not least – I had in my bag all of the small stuff I talked about in this article. All the time except for the tougher hikes.
3. What’s better for photographers? Hiking down or Rim Trail?
I’m a bit torn about this one. Hiking down opens up new perspectives and photography opportunities but it’s hard to focus on anything else than hiking.
On the other hand, I genuinely enjoyed photographing from the Rim Trail. To walk around, look for compositions, setting up the tripod. Doing it all in a very relaxed way. Plus the view from the rim is probably the best one anyway.
Do you have any question about photographing in the Grand Canyon? Fire away!
Pin this for later:


Great article with all you need to know! Awesome, thanks!
Thaaaank youuu! 🙂
My husband I will be staying at El Tovar on 6/18/21 and 6/19/21. We are interested in a photography tour on 6/19, do you have any availability?
Hello Andrea, I appreciate your question! However, I don’t offer photo tours. I hope you’ll find a great one and enjoy your trip! 🙂