The Holy Trinity in photography (sometimes also called the Sacred Trinity) is what you would call the union of the shutter speed, aperture and ISO.
They say for a good reason that photography is a joint of art and science. This article will give you a brief introduction to the geeky part of photography.
It should help you step up your skills a fair bit. Maybe even stop using the Automatic mode on your camera. Shutter speed? Aperture? ISO? All that, right here.
What on earth do all these numbers mean? Getting to know your camera gear is one of the first steps on your way to becoming an accomplished photographer.
And of course – manufacturers use various wording, different marketing names, and shortcuts. However, the principles are always the same! In the end, it’s all physics!
And for the completeness of the information – I am a Canon user, which might have an impact on some words I use in this article 🙂
Let’s start with the most important aspects (or indicators if you like) which I personally like to call the Holy Trinity of Photography. If you don’t learn anything else about your camera besides these three aspects, you’ll still learn a lot. That’s why the slightly heretic name.
A simple guide to shutter speed, aperture and ISO
Remember these:
- Shutter speed
- Aperture
- ISO speed
All three have one thing in common and in the end do the same – they control the amount of light hitting the sensor of your camera and essentially how your picture will look like.
They are all deployed at the same time, you cannot switch one of them off. Changing one might lead to the necessity of changing the other.
Note that all my example images below were taken while changing all 3 parameters at the same time. But before we start looking into each individual aspect, you’ll need to unleash their power by switching your camera into Manual mode.
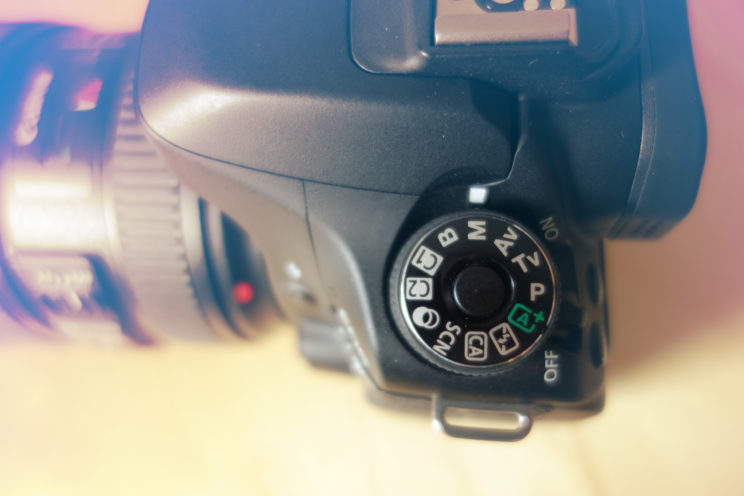
Shutter speed, aperture and ISO are all deployed at the same time, you cannot switch one of them off. Changing one might lead to the necessity of changing the other.
1. Holy Trinity – Shutter Speed
Long shutter speed = more light
Short shutter speed = less light
This parameter tells you how long the shutter will stay open and let light hit the sensor. In other words – it freezes the time.
If you set the shutter speed to a bit longer time, you’ll be able to create some cool effects. Like blurred tree leaves or snowflake trails.
Very long times will bring you kind of dreamy, almost surreal effects. The easiest way to illustrate the power of shutter speed is on a photograph of running water. I think the images below are self-explaining:
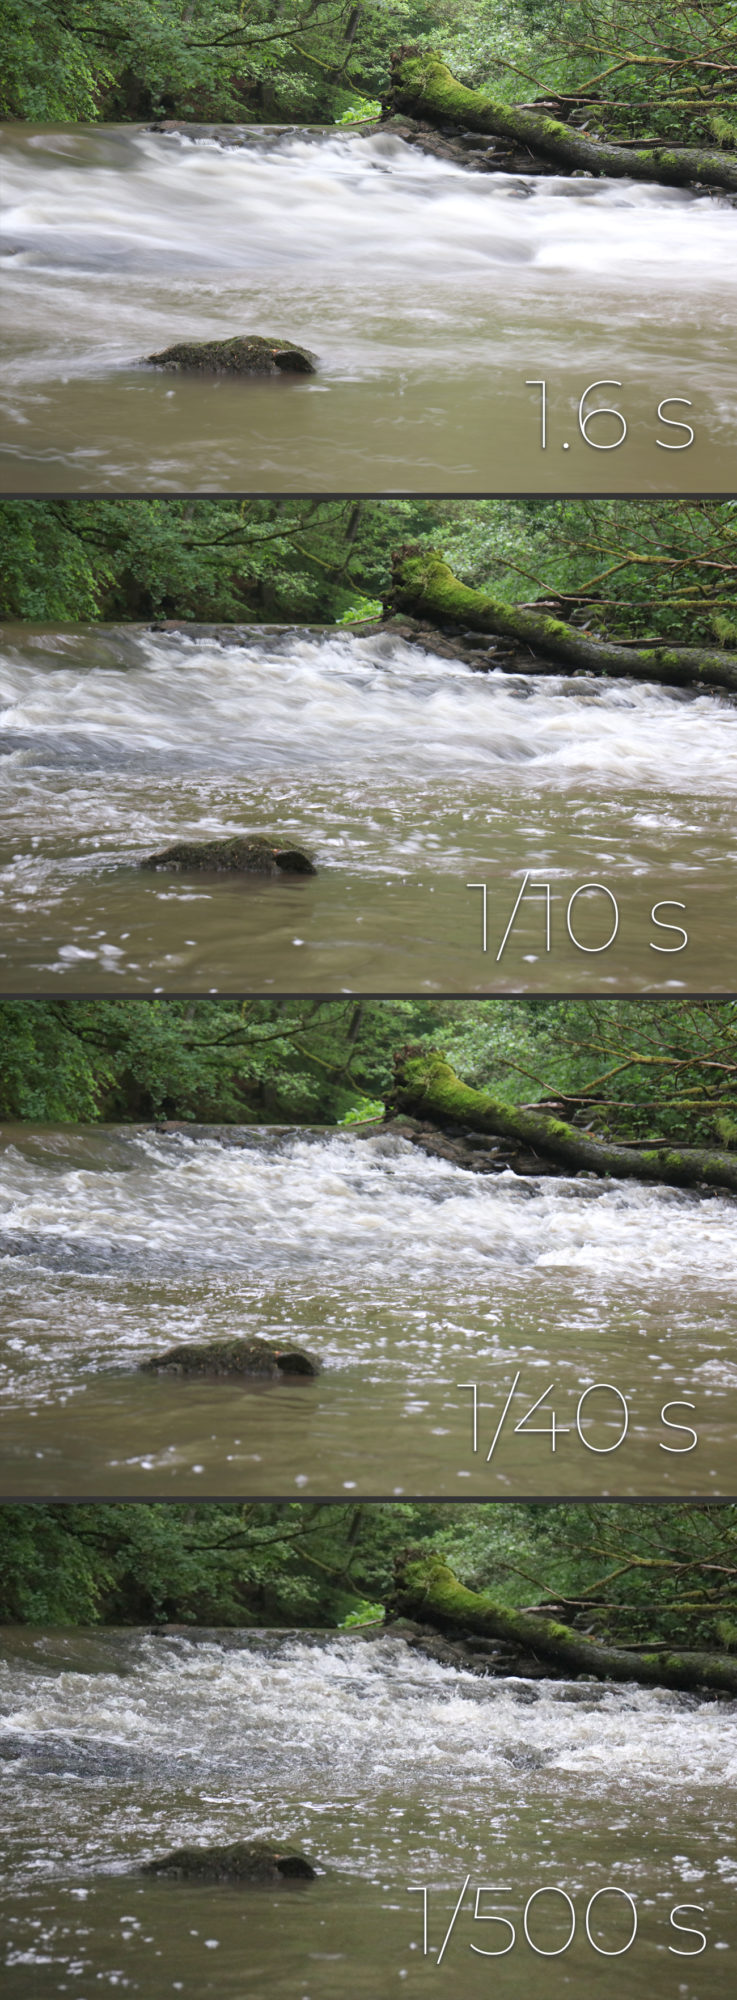
To be able to play around with shutter speed (e.g. for emphasizing the dynamic movement of your subject), you’ll absolutely need a stable tripod. Or at least something to put your camera on.
Otherwise, you’ll just end up with very unsharp photos.
Unless you use “the golden rule of handheld shutter speed” – the longest time you may use without a tripod is as many x-th of a second as your used focal length (or “zoom” if you like). Don’t use times longer than that, if you don’t have arms made of steel. Check out below:
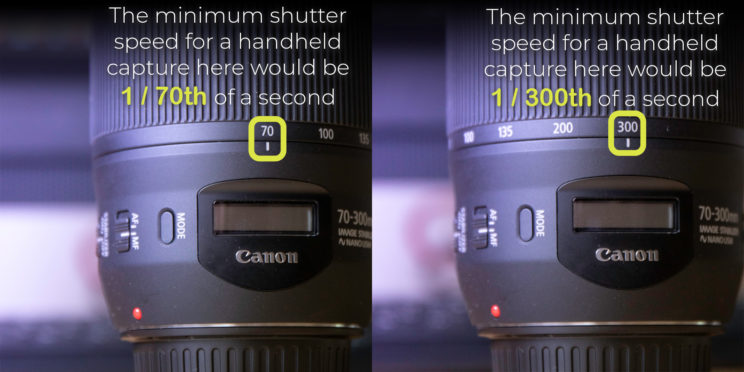
So logically, the wider lens (e.g. 10-18 mm), the less shaky it is and the longer shutter speed you may use handheld.
For long lenses (like 200 mm+), you’re simply going to need a tripod or at least some kind of support. Or a superfast shutter speed since even the slightest shake will make the final image wobbly.
REMEMBER: When using this golden rule, don’t forget to take the crop-sensor factor into your calculation! E.g. I’m using a Canon 80D, a cropped sensor camera. The crop factor is 1,6. That means that when I shoot with focal length 300mm, my handheld minimum shutter speed is not 1/300th of a second but 1/480th of a second!!! (300 x 1,6)
2. Holy Trinity – Aperture
Large aperture (low F-number) = more light
Small aperture (high F-number) = less light
I bet you’ve seen those photos where the main object in focus is as tack-sharp and everything else is blurred nice and creamy.
Such an effect is called “bokeh” in the social media world. It is very popular and exists thanks to an aperture. For everyone else, I prefer the term “depth of field”. Check out the series below to see what effect various apertures have:
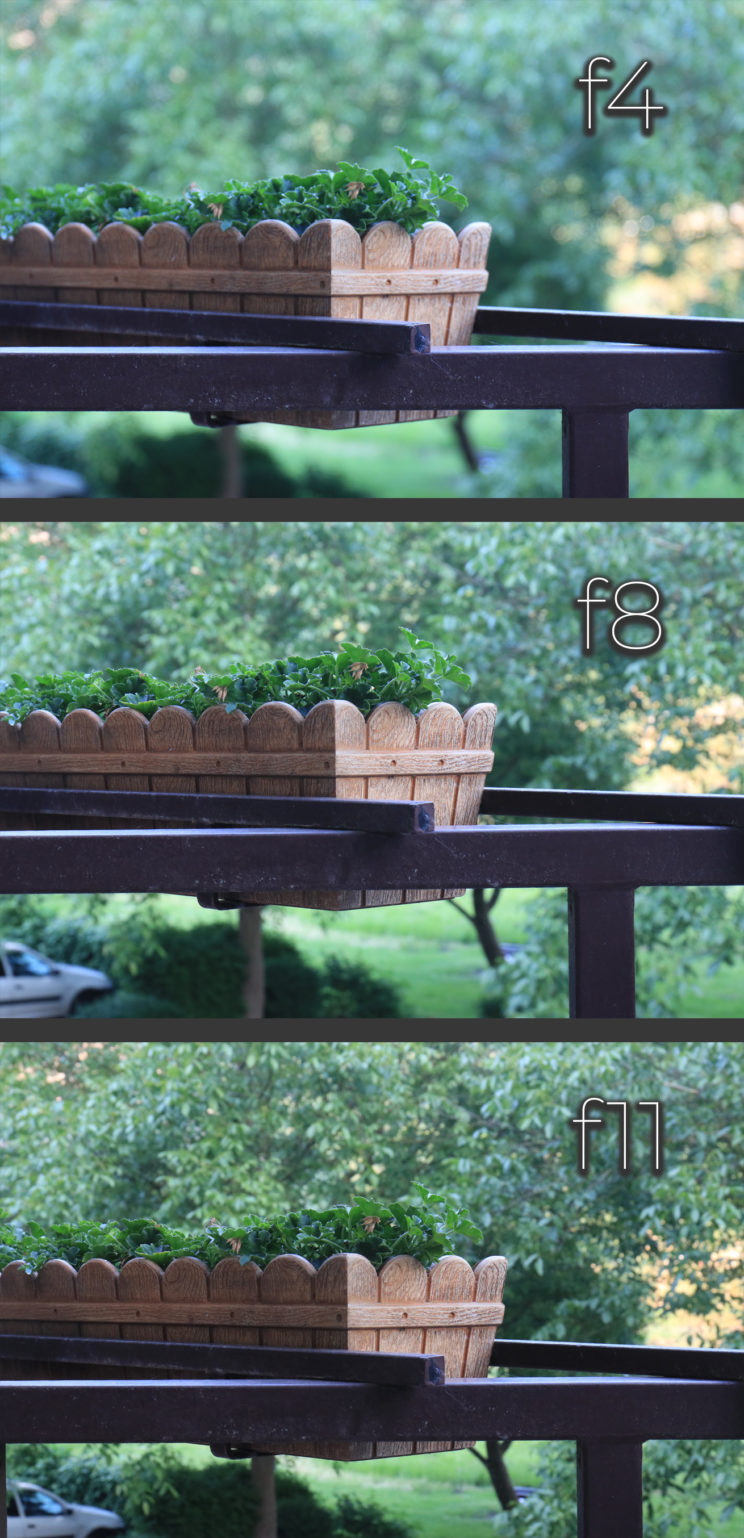
I will not go too much into detail about what exactly aperture is and how it works – you can imagine it as a pupil of your camera which you can control (unlike your own pupil which stretches wide in dark and shrinks in bright light quite automatically).
On your camera, it is the value with “F” in front of it.

What you really need to remember is that large aperture generates a large amount of background blur (shallow depth of field) and small aperture generates a small amount of background blur (large depth of field).
Rather confusingly, the large aperture is represented by a low number and the way around. The aperture boundaries are set by your lens.
Now, whereas pretty much all lenses can give you small apertures, not every lens can offer you large apertures (let’s say below F3.5). That makes the latter ones very expensive (and often very heavy too :)).
One last thing – always think about your aperture in relation to what you photograph. Landscape photographers will stay mostly somewhere between F9 and F13 to minimize the background blur. But don’t take it as a rule!
Portrait people and videographers will probably often enjoy going to F1.4 to F4 to have the nice creamy subject separation. And nightscape photographers will spend most of the time with the highest aperture they have to let as much light in as possible.
3. Holy Trinity – ISO speed
Large aperture (low F-number) = more light
Small aperture (high F-number) = less light
ISO speed in simple language brightens up or darkens the image. If you made it until here, you could rightfully expect that it is not as simple as that. High ISO values increase not only the amount of light flowing onto the camera sensor, but they also introduce more noise.
That’s why many photographers try to keep the ISO as low as possible (which is ISO100 or ISO50 on some cameras), especially in landscape photography. Keeping the noise low also helps in editing your RAW images.
Nevertheless, with good modern cameras, you can go as high as ISO3200 with still very satisfying results.
And don’t forget – the best photo is the photo which is done. If I had to choose between lots of noise or no image, I’d always go for lots of noise. That was also the case of shooting in the Antelope Canyons.
So again – keep in mind what you’re photographing – e.g. wildlife photographers will often go for higher ISO in order to keep the shutter speed as short as possible (thousandths of a second) and reduce the shake as they usually use long lenses.
I took a couple of pictures in a dark room to illustrate the difference between using low, medium and high ISO values.

Missing something? Leave me a comment below!



Sauguter Artikel, super anschaulich dargestellt. Mega!
Danke, liebe Rebsi! 🙂
Fab article and easy to understand
Thank you!